A Beginner's Guide to Setting up Free Webhooks with Cloudflare Workers

A beginner with no programing experience can take this tutorial to setup a free webhook server with Cloudflare Workers
In my previous tutorial, A Beginner's Guide to Patreon Automation with Webhooks, I demonstrated how to use Postman to create a mock server for testing Patreon's Webhooks. The mock server only receives test data from Patreon and does not perform any further actions. However, in a real-world production environment, we need our application to trigger other actions after receiving an update from Patreon. For this purpose, we rely on a robust and secure Webhook server to streamline our business processes. In this tutorial, you are going to learn how to set up a free Webhook server with Cloudflare Workers that is ready for production.
Prerequisites
Before we get started, make sure you have the following:
- A Cloudflare account. If you don't already have one, check this tutorial out.
Create a Cloudflare Worker
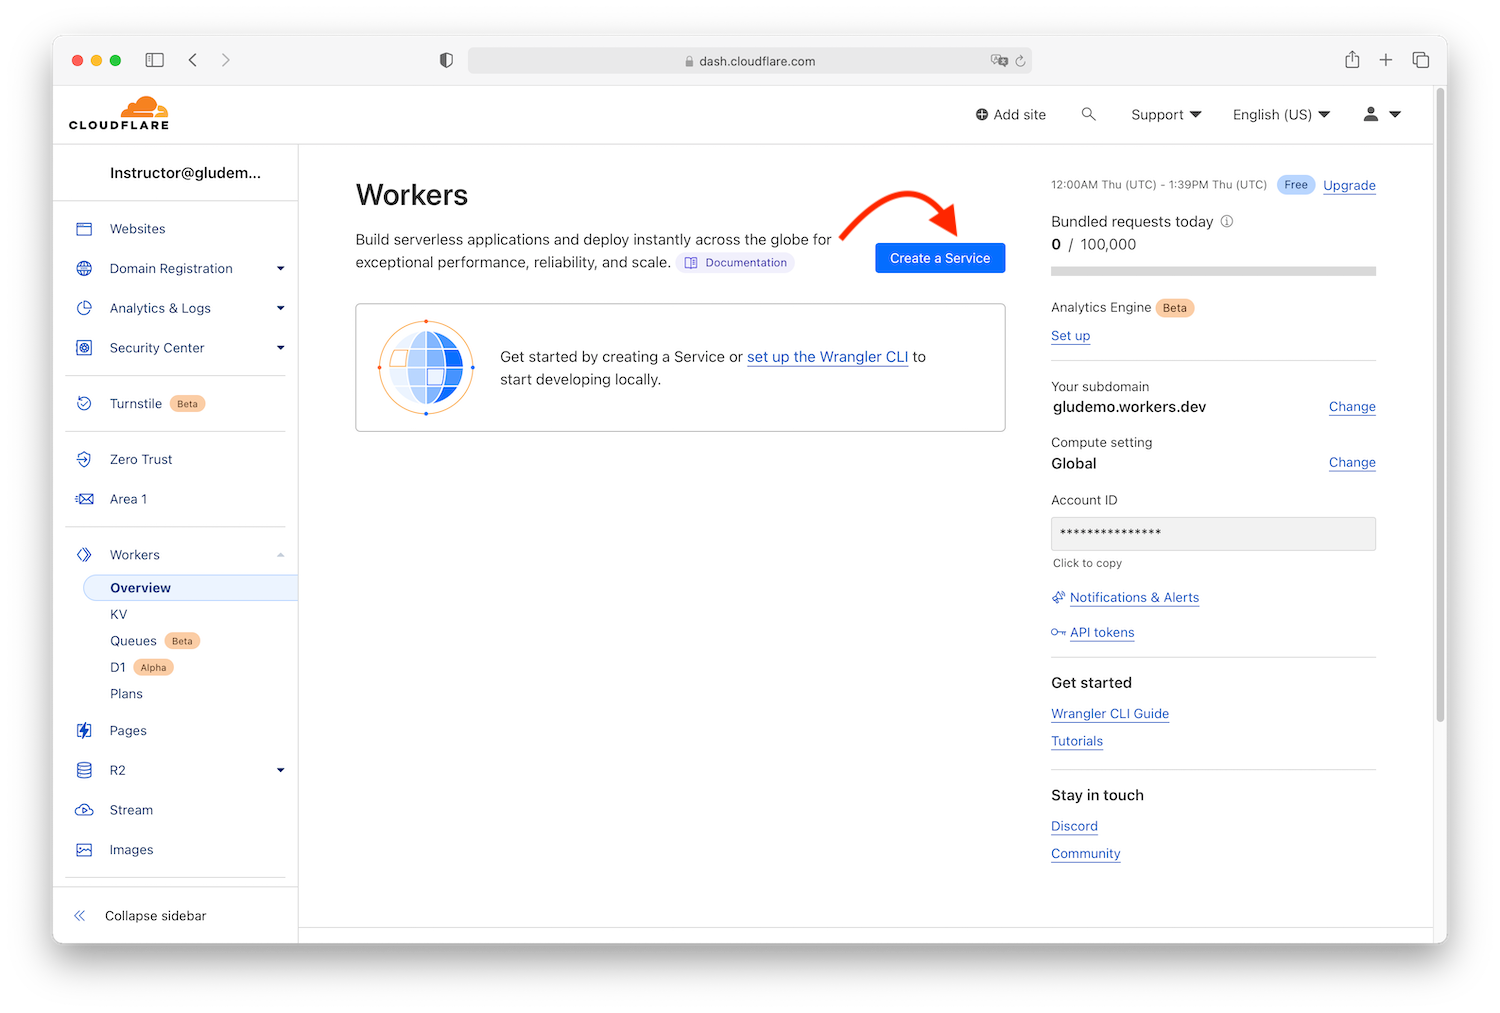
Log in to your Cloudflare account and navigate to the Workers dashboard. Click the Create a Service button to create a new worker.
Give your new Worker a name, in this tutorial, we'll name it webhook. Next, select a starter template. You can select any of them because we will eventually replace the prefilled codes and use our own. Click Create service button to continue.
Now you have a Cloudflare Worker created. See the below screenshot and instructions to learn some basic usage of it.
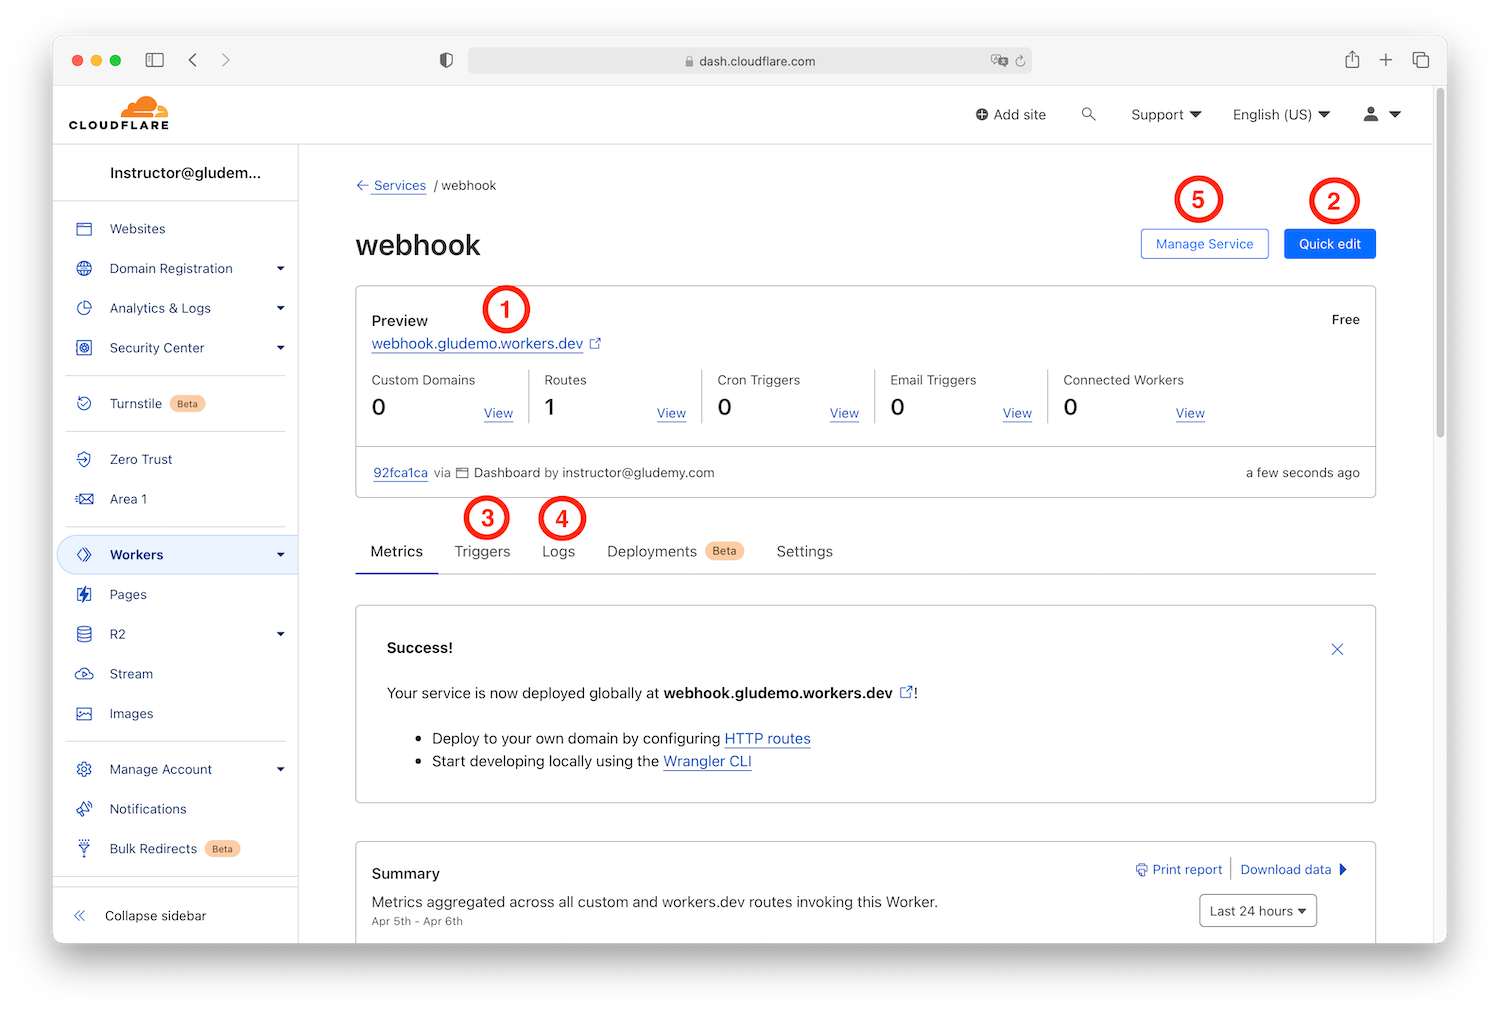
- The Worker's URL. This is the link to your Cloudflare Worker, it's also the webhook server URL that we are going to use for Patreon.
- Quick edit button. This button will open an online code editor for this Cloudflare Worker, you can edit code right from your web browser without needing to set up a local development environment.
- Triggers. This is where you set a custom domain name for your Cloudflare Workers.
- Logs. This is where you track logs for requests, we usually use it for testing or debugging purposes.
Build a simple webhook server
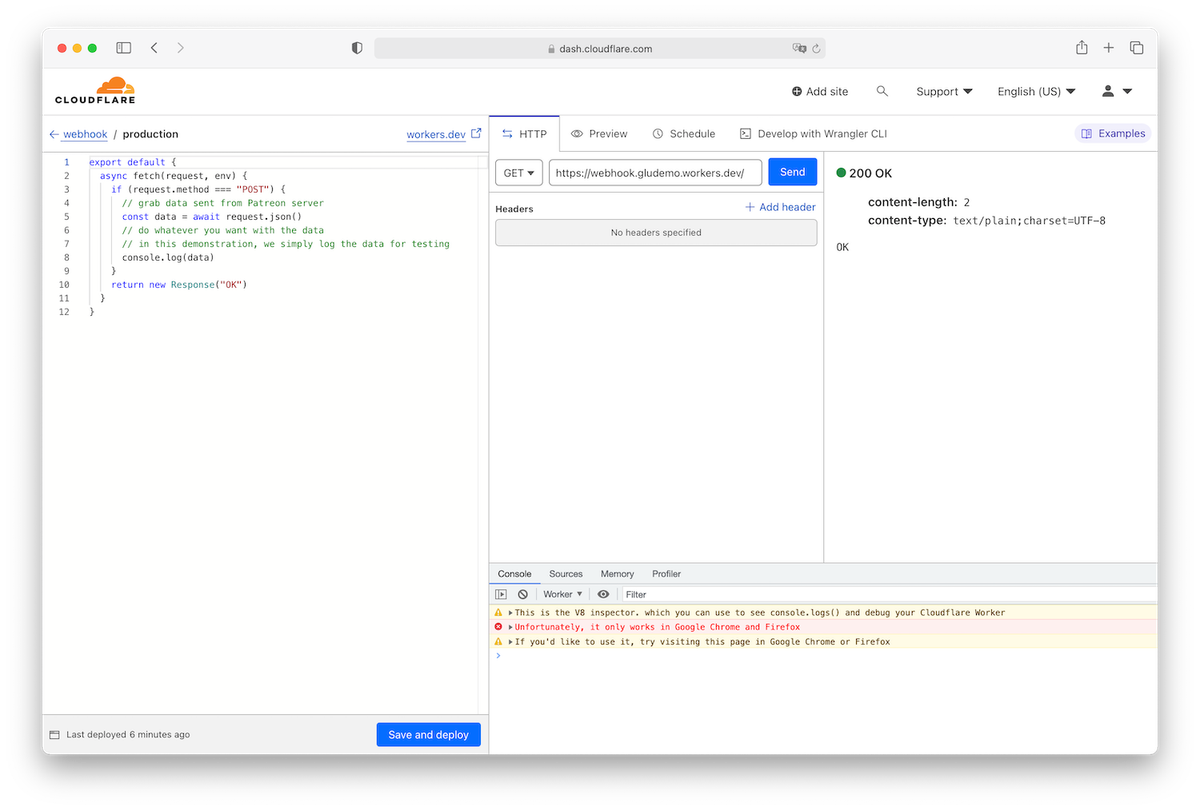
Cloudflare offers a convenient online code editor that allows you to edit code right from the web browser. Click on the Quick edit button and you will be redirected to the online code editor.

Copy the below code snippet to replace all existing codes in the code editor on the left side, and click the Save and deploy button.
export default {
  async fetch(request, env) {
    if (request.method === "POST") {
      // grab data sent from trigger server
      const data = await request.json()
      // do whatever you want with the data
      // in this demonstration, we simply log the data for testing
      console.log(data)
    }
    return new Response("OK")
  }
}
The above code snippet simply grab data sent from Trigger's server, and it logs the data into the console for testing purpose. Next, we are going to trigger a test event and track the log with Cloudflare Workers' real-time logs.
Test the webhook server
Follow the below steps to test the webhook server.
- Login to your Patreon account as a creator.
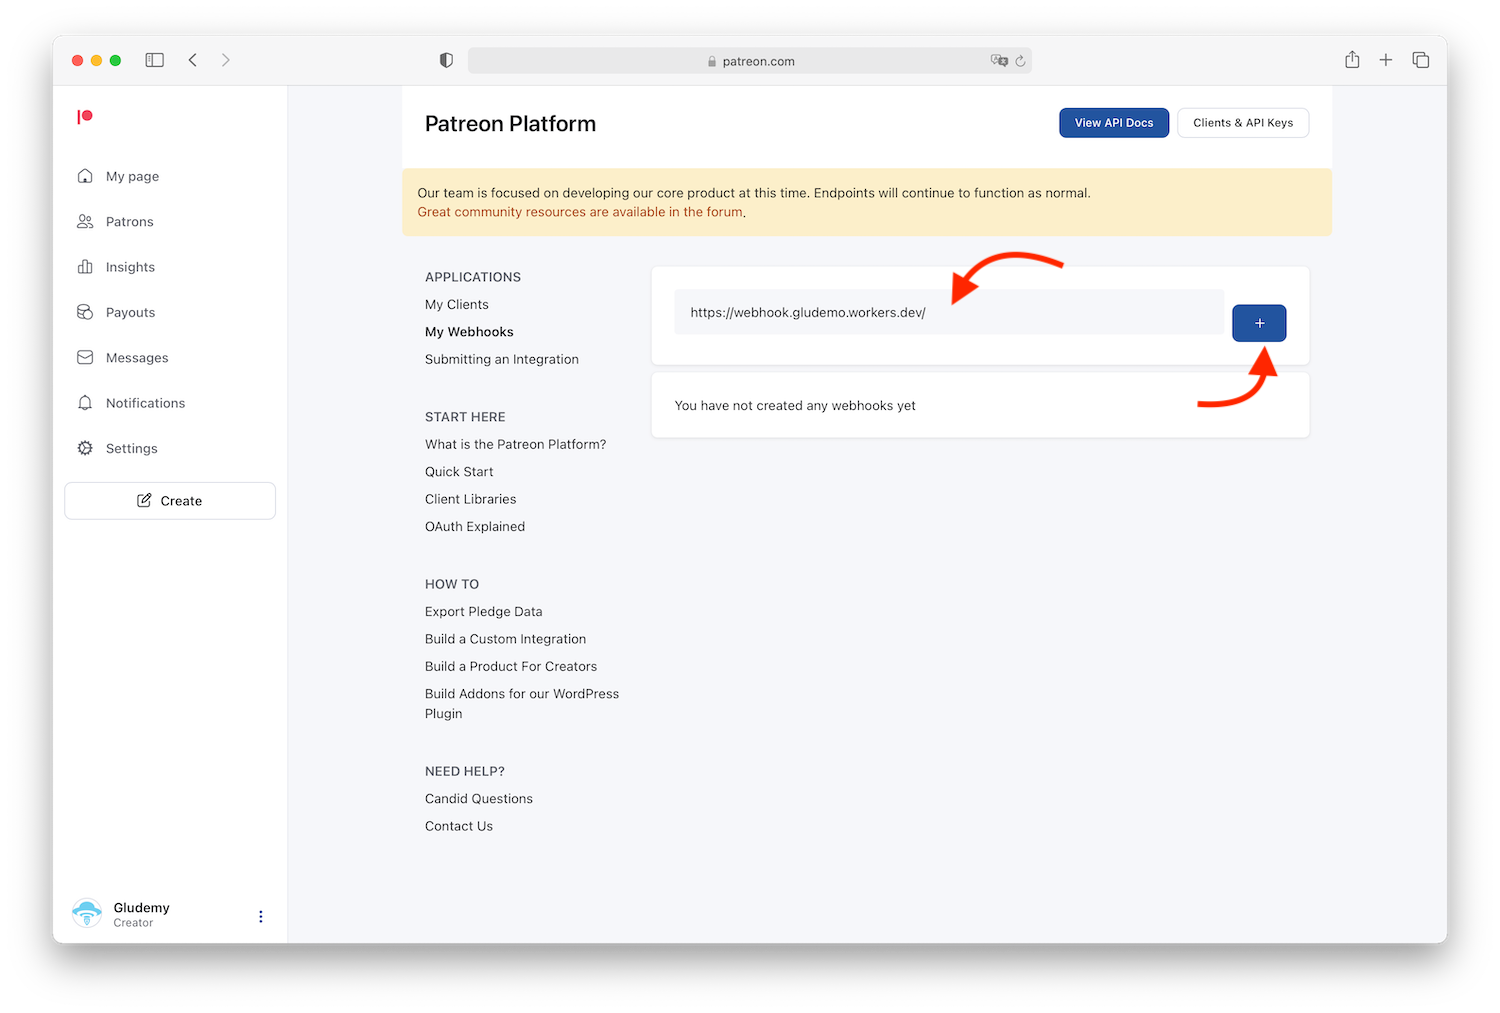
- Go to the Patreon developer portal and navigate to the My Webhooks menu.
- Copy the Worker's URL and paste it into the box, and click the add button.
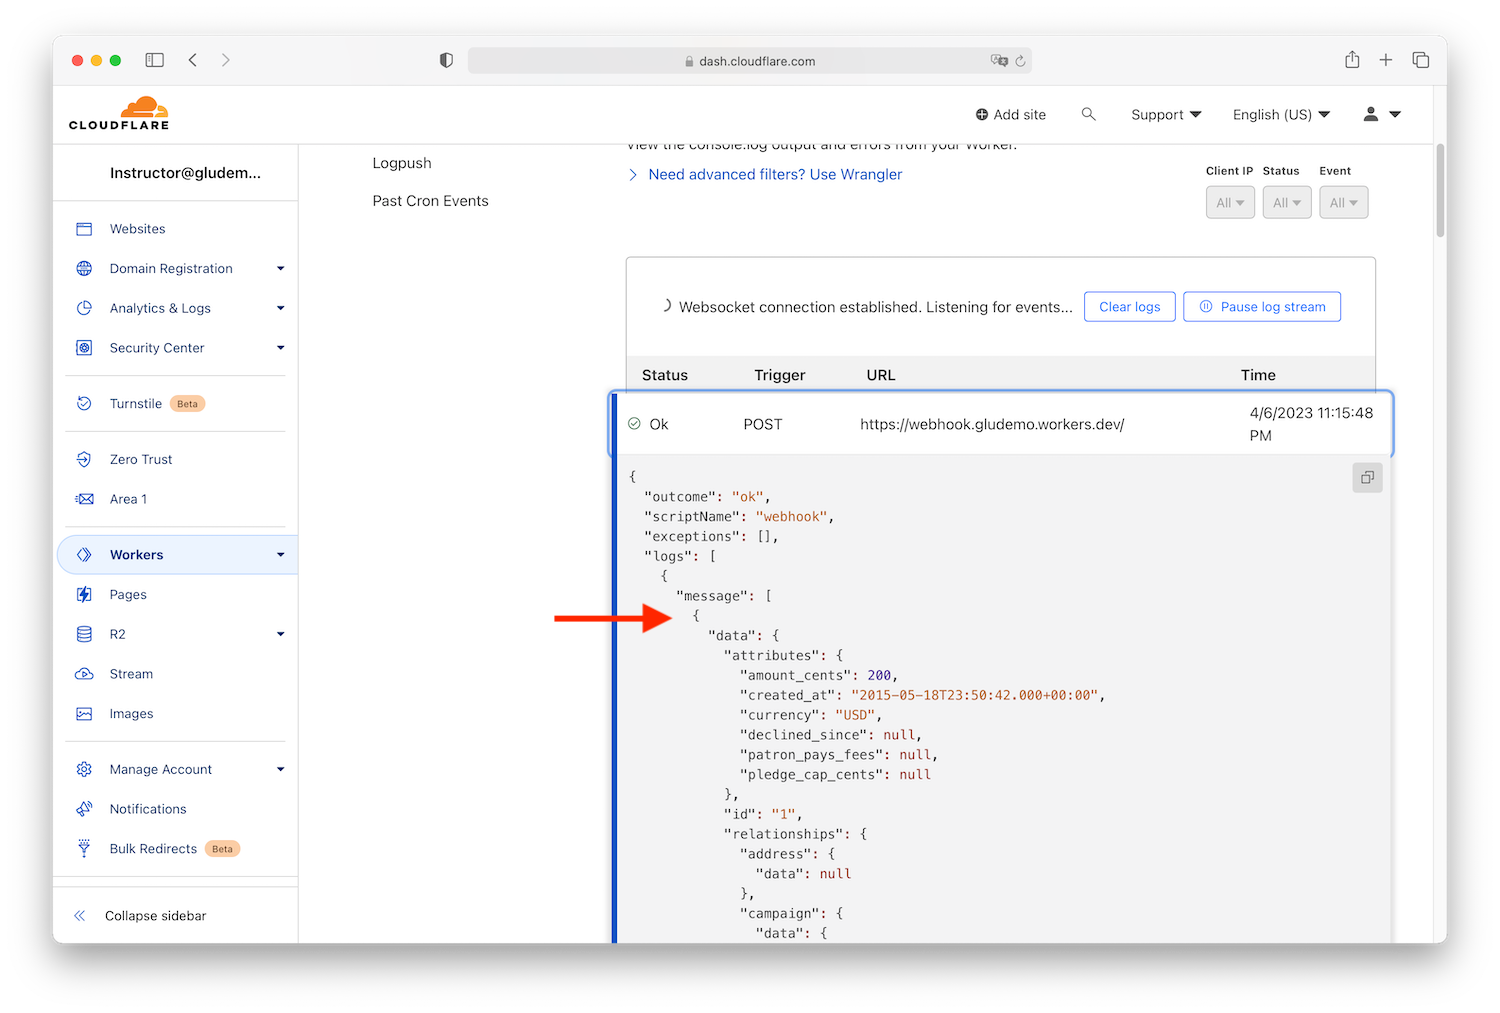
- Go to your Cloudflare Worker's Logs management, choose Real-time Logs then click Begin log stream.
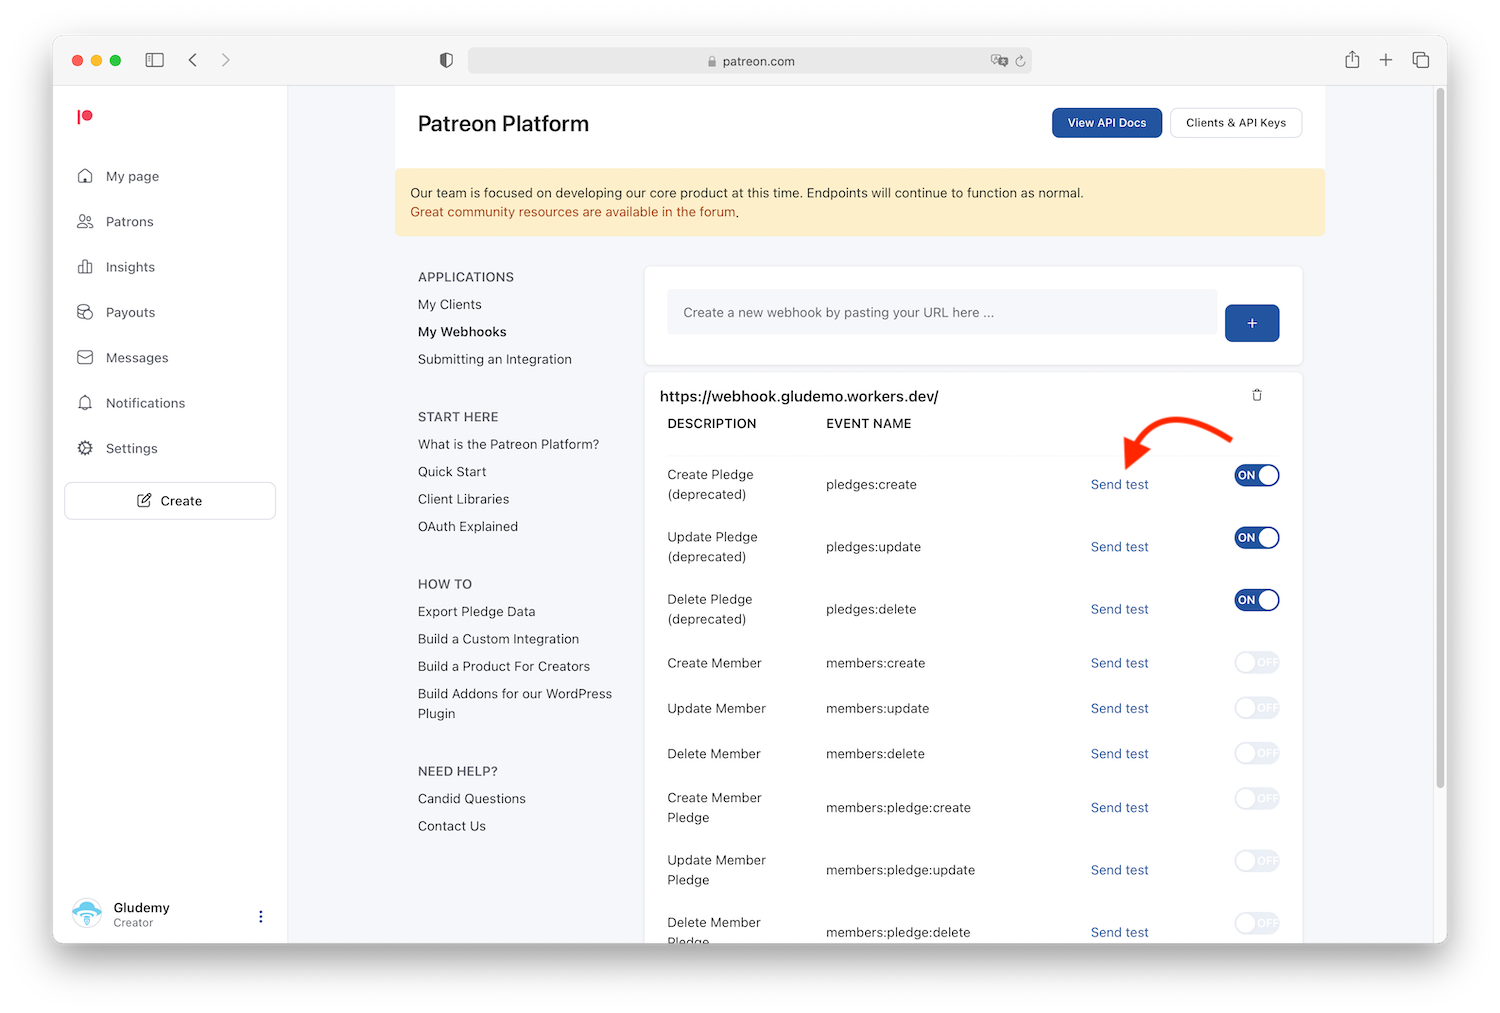
- Click the Send test button on the first API and confirm in the next popup.
- Go back to your Cloudflare Worker's Log page to see the test data received from Patreon.
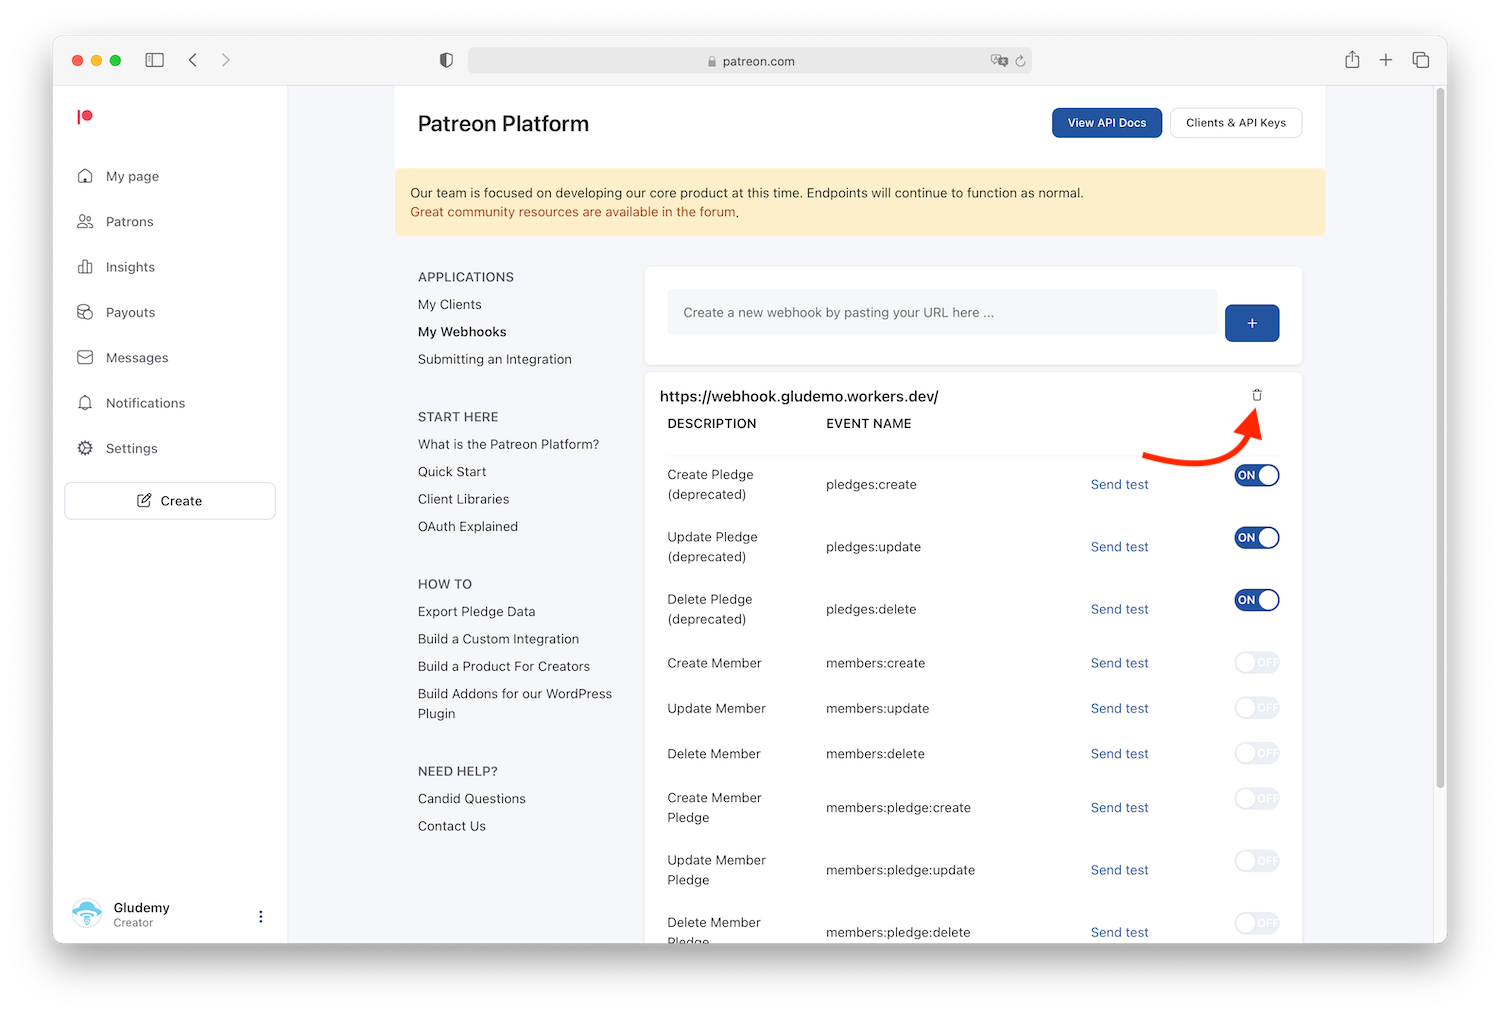
Delete a webhook server from Patreon
To delete a webhook server from Patreon, simply click the delete icon on the right of your webhook server URL.
Build a production-ready webhook server
In the above steps, we built a simple webhook server with Cloudflare Workers to receive real-time data sent from Patreon's server. There's still a question, what if someone posts fake data to your webhook to scam your application? The answer is webhook encryption. We are going to improve our webhook server so it will act only if the data is sent from Patreon.
To make it short and clean, just copy the below code to replace all code in the Cloudflare Workers we have built in the above steps. Please be sure to replace the YOUR_SECRET_KEY_COPIED_FROM_PATREON with your own secret key from your Patreon.
export default {
  async fetch(request, env) {

    try {
      if (request.method === "POST") {
        // get headers and request data
        let requestHeaders = Object.fromEntries(request.headers);
        const body = await request.json();

        // computing hex
        const encoder = new TextEncoder();
        const myText = encoder.encode(JSON.stringify(body));
        const secretKeyData = encoder.encode('YOUR_SECRET_KEY_COPIED_FROM_PATREON');
        const key = await crypto.subtle.importKey(
          'raw',
          secretKeyData,
          { name: 'HMAC', hash: 'MD5' },
          false,
          ['sign']
        );
        const mac = await crypto.subtle.sign('HMAC', key, myText);
        const hex = Array.prototype.map.call(new Uint8Array(mac), x => (('00' + x.toString(16)).slice(-2))).join('');

        // comparing signature
        if (request.headers.get('x-patreon-signature') !== hex) {
          // Webhook request did not come from Zoom
          console.log('Request not authorized');
          return new Response('Request not authorized', {
            status: 401
          })
        } else {
          // Webhook request came from Patreon
          console.log('Authorized request');
          return new Response('Authorized request', {
            status: 200
          })
        }

      }
      return new Response("Access Denied")
    } catch (e) { return new Response(err.stack, { status: 500 }) }
  }
}
What now?
Now you know how to set up a free webhook server with Cloudflare Workers, the webhook server can be used to listen to Patreon's updates and action on those updates. Below is an unexhausted list for your inspiration.
- Send a welcome message on the Discord channel whenever a new Patreon pledges.
- Add a new Patreon to your aMember membership system.
- Send a custom email to your new Patreon.
Wrapping up
In this tutorial, you have learned how to set up a webhook server with Cloudflare Workers, use the Worker for Patreon and test it, and delete a webhook server from Patreon.