Proxy switcher for Mac: The native way

By switching between locations, you’re switching between different proxies.
Most people configure a proxy for their network on Mac by going to Network > Wi-Fi > Details and configure and toggle one by one. This tutorial will show you how to switch between proxies on Mac with a shortcut
This tutorial works for Mac OS 13.4.1
I assume you have two proxies (below are examples of proxies for demonstration only):
Proxy #1
IP address: 123.123.123.123
Port for HTTP & HTTPS: 1080
Port for SOCKS: 1081
Proxy #2
IP address: 234.234.234.234
Port for HTTP & HTTPS: 1080
Port for SOCKS: 1081
First, let’s set up a location called Proxy #1 configured with the settings for Proxy #1.
Step1: Add a location
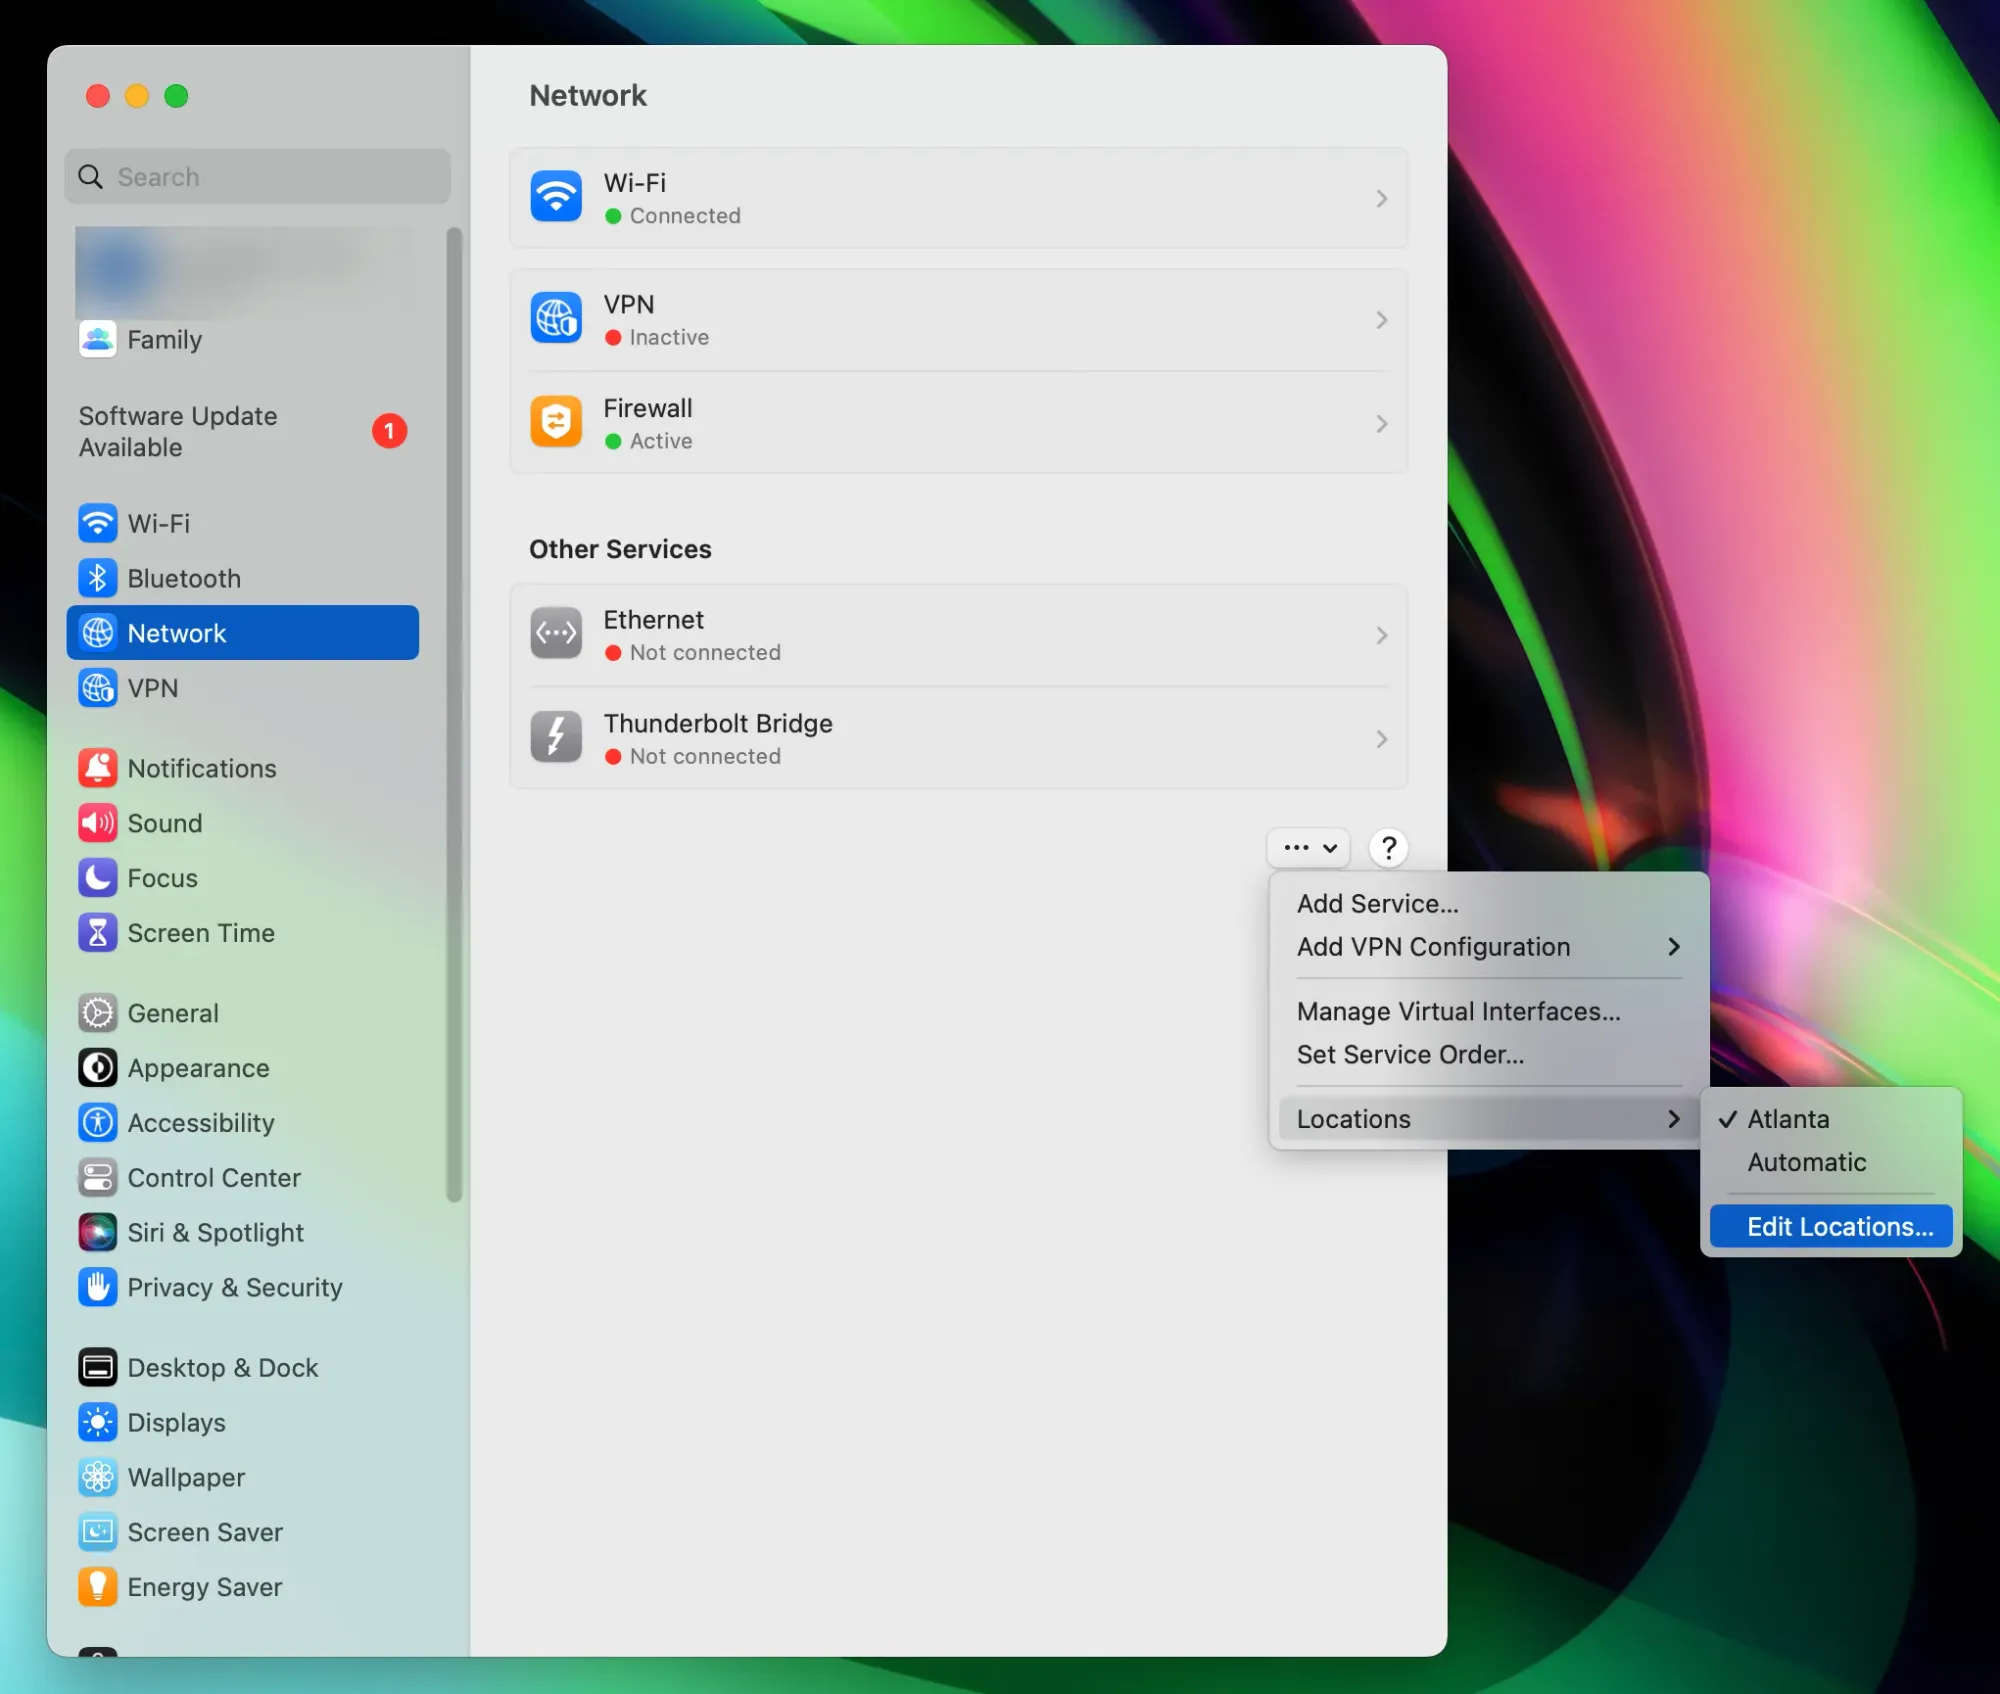
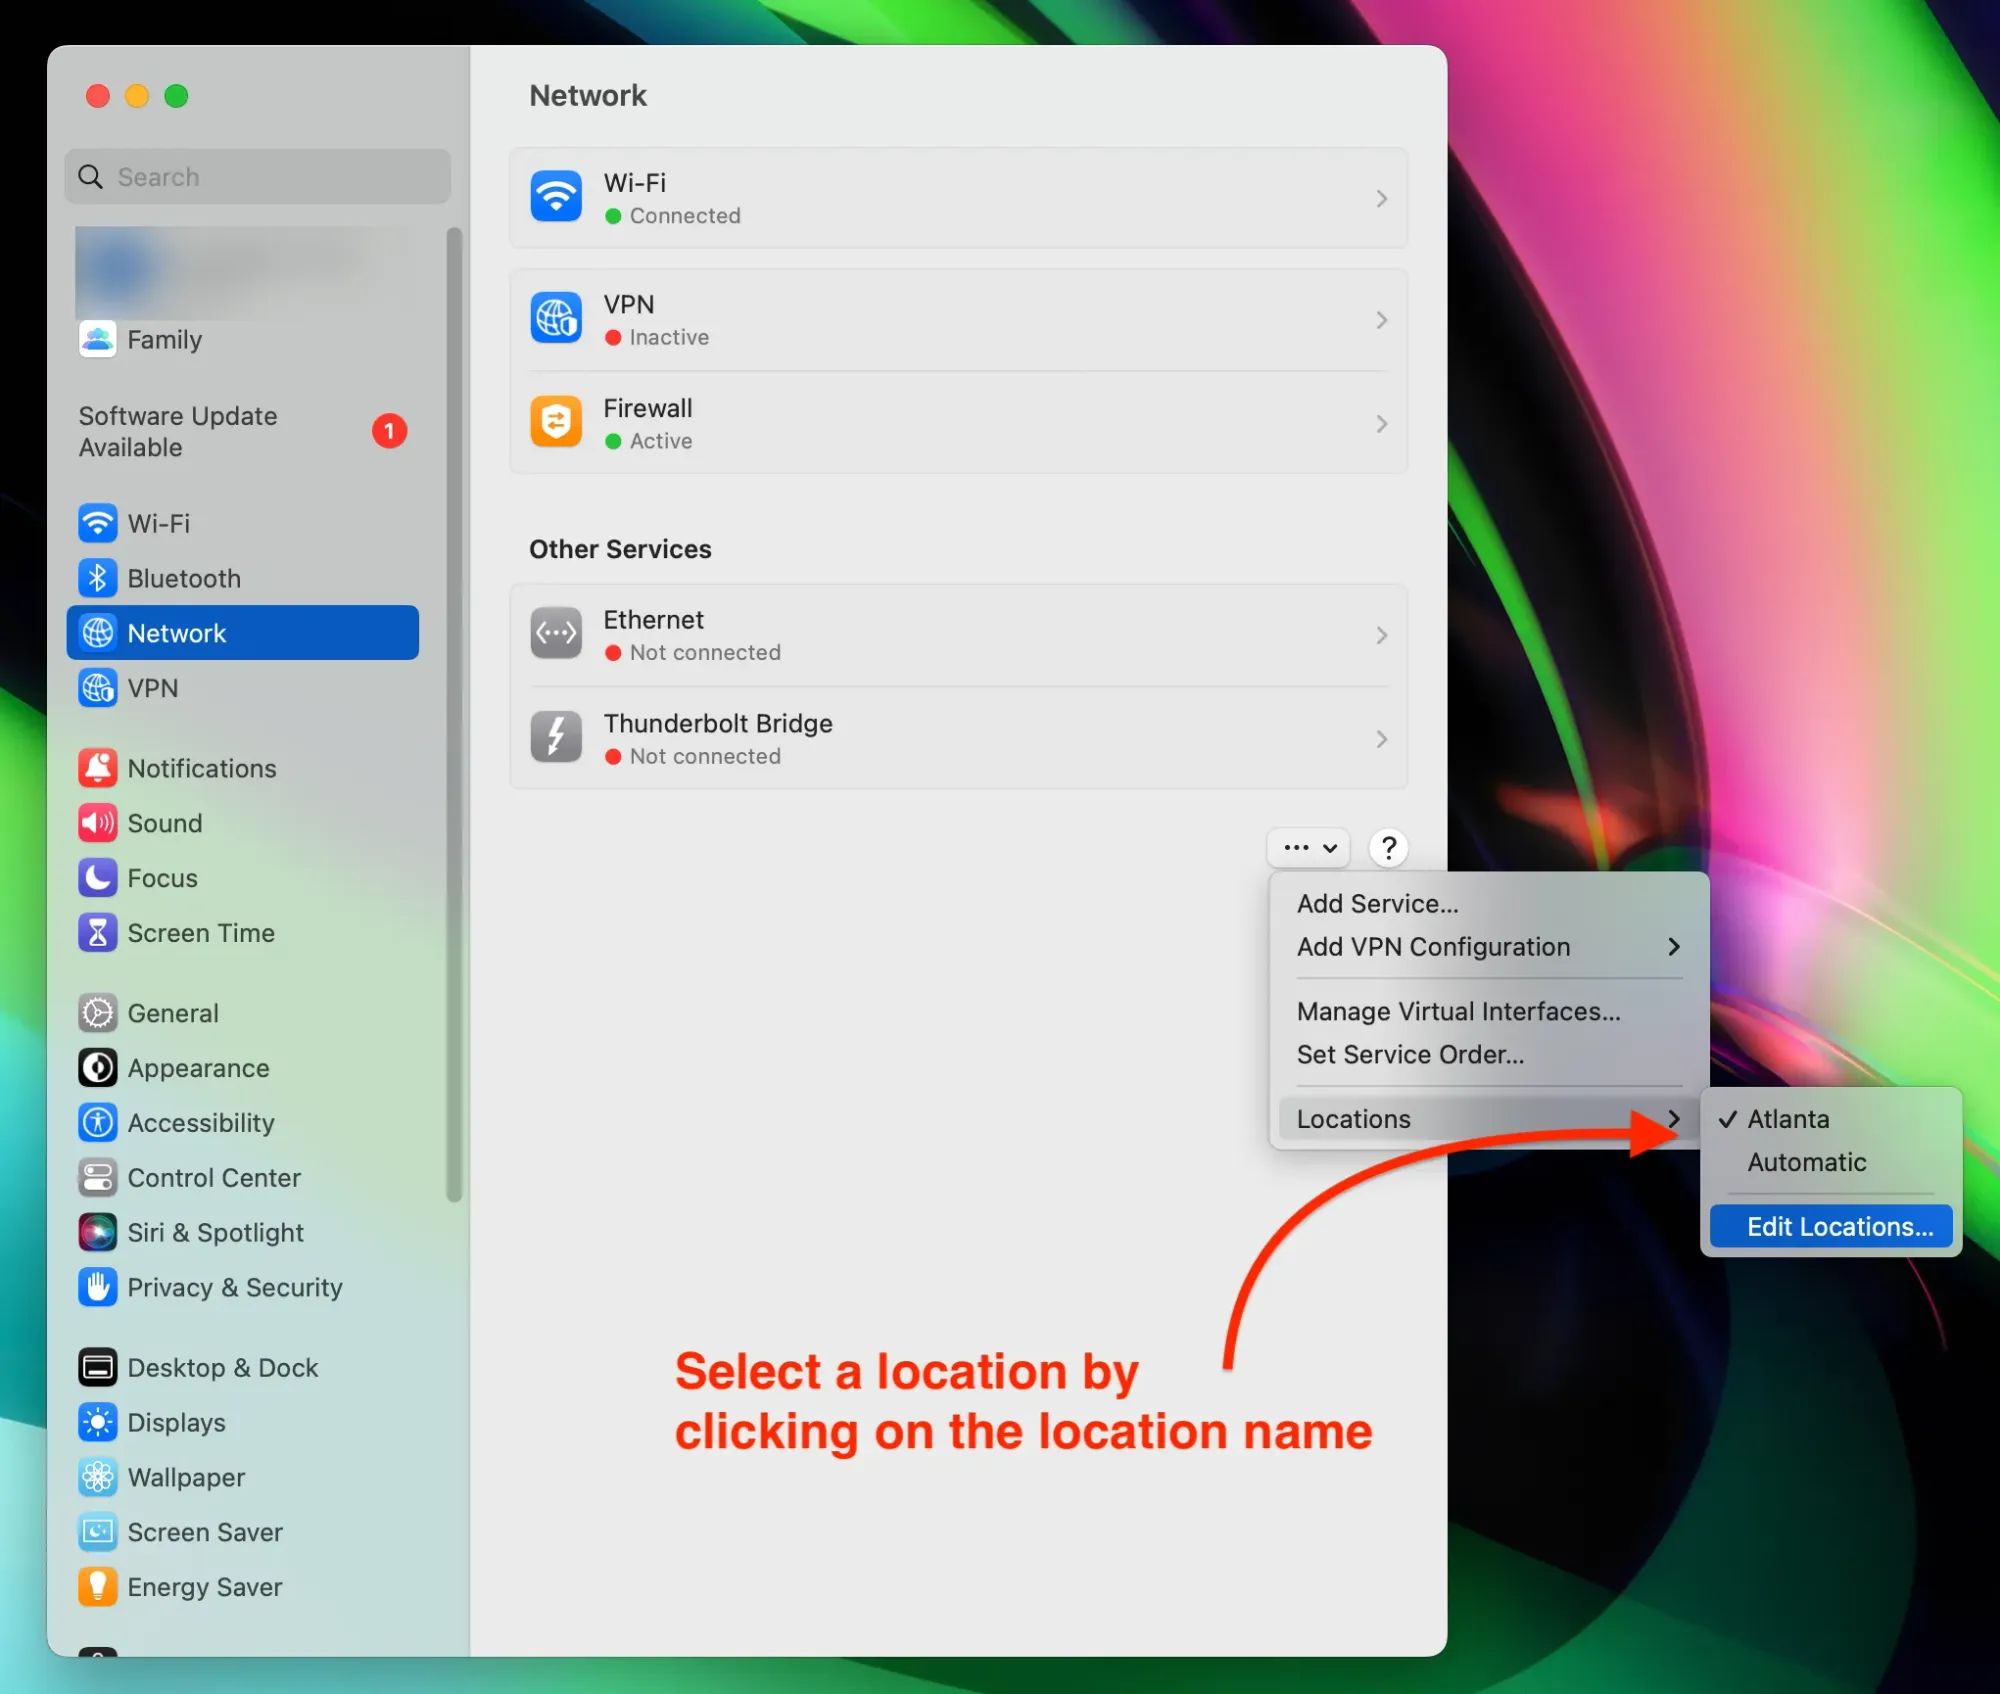
Go to the System Settings > Network, click on the three-dot dropdown menu, hover over the Locations, and click Edit locations. Click the add icon to add a new location named Proxy #1.
Step 2: Configure a proxy for that location
Once you add a location, select it from the dropdown menu in the last step.
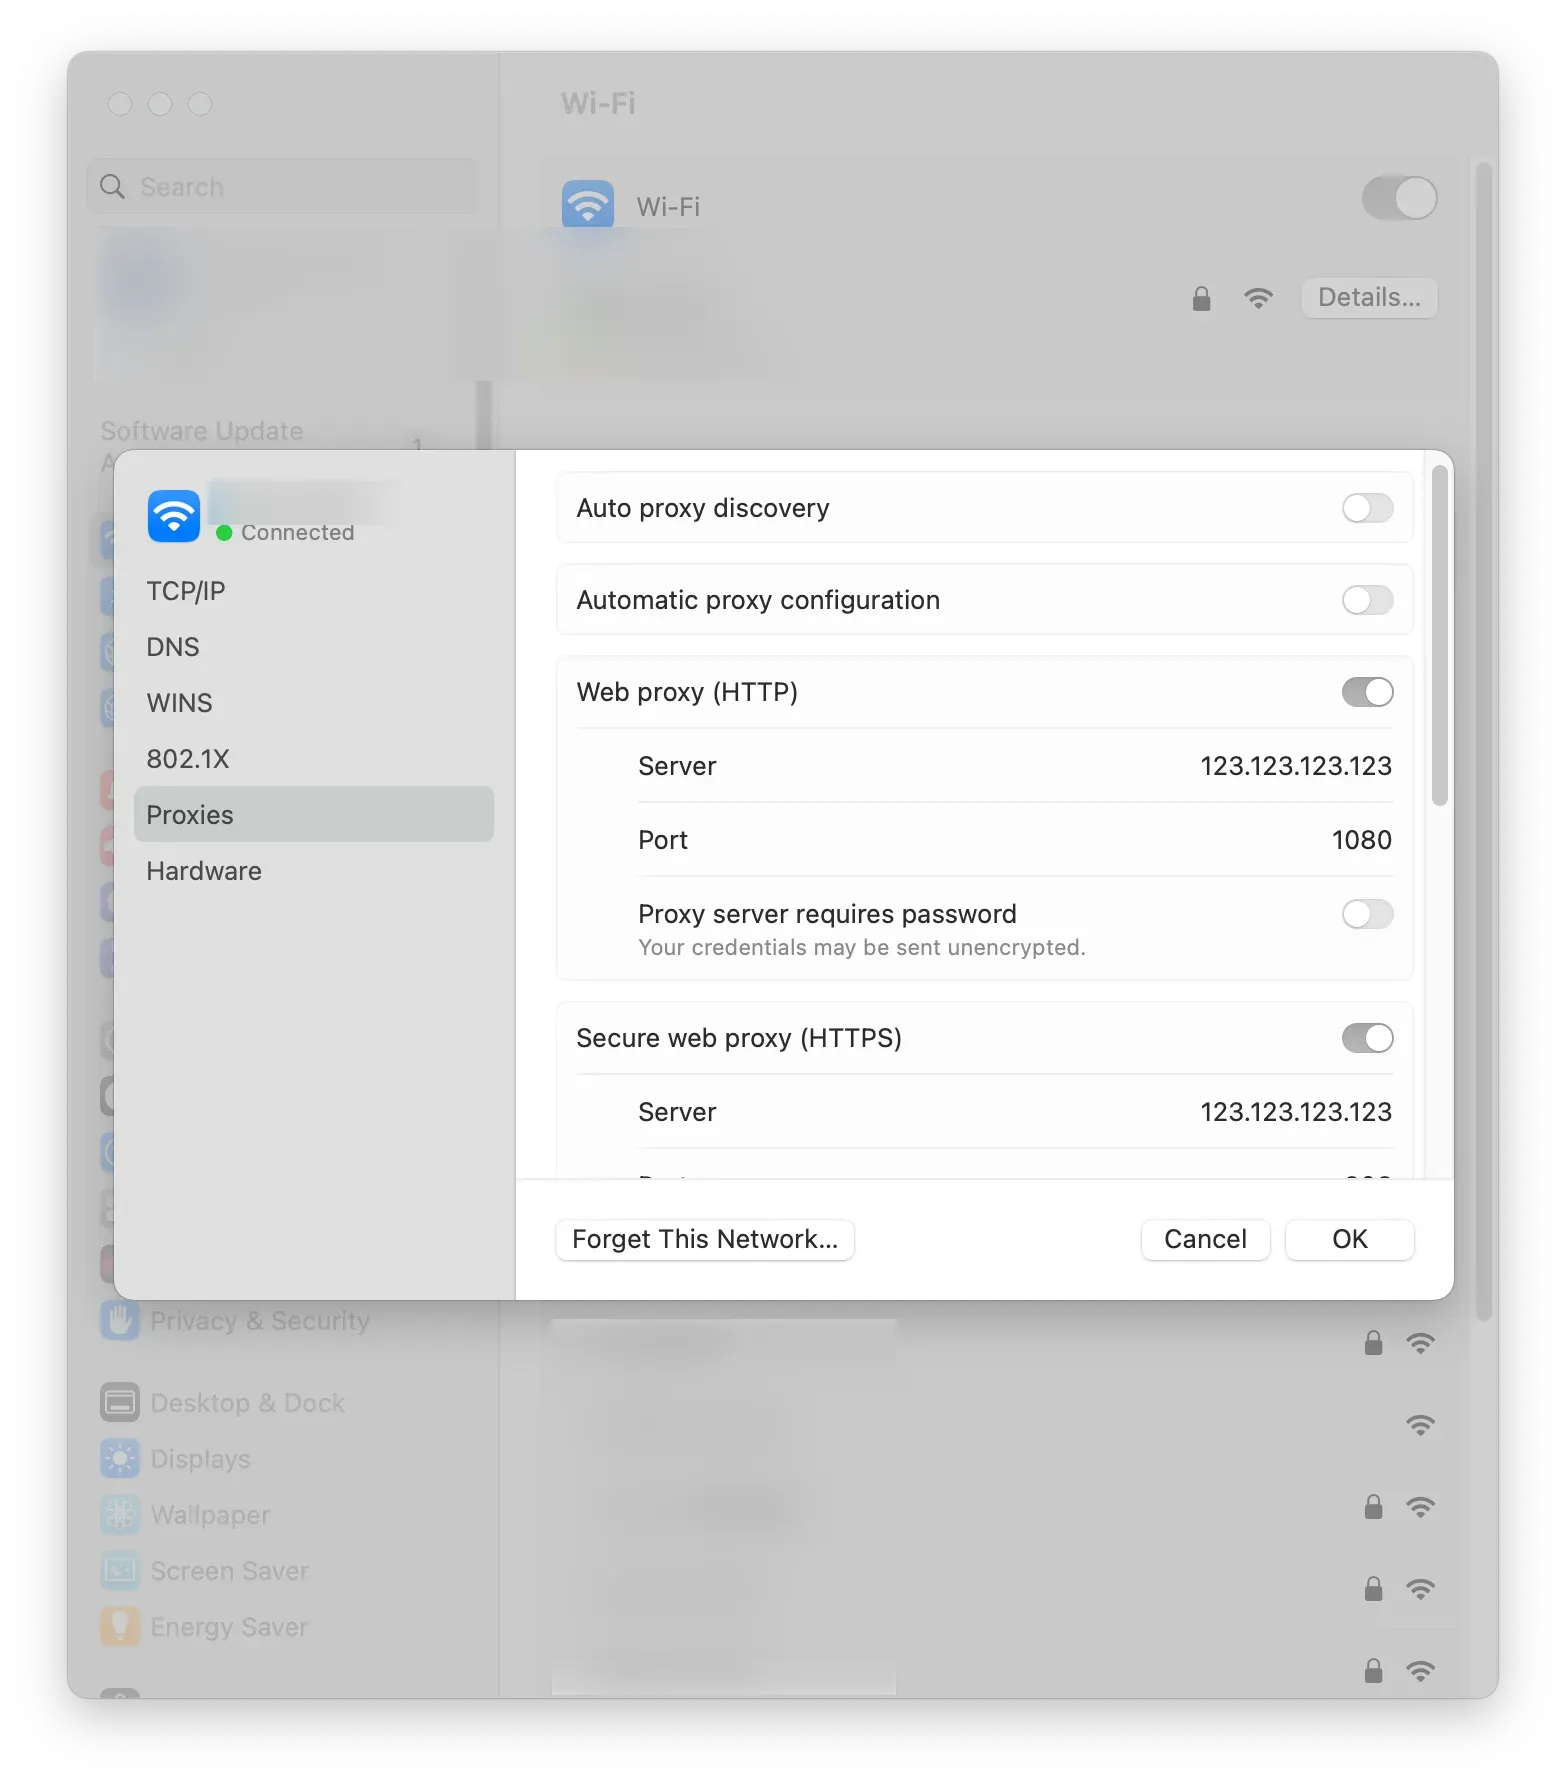
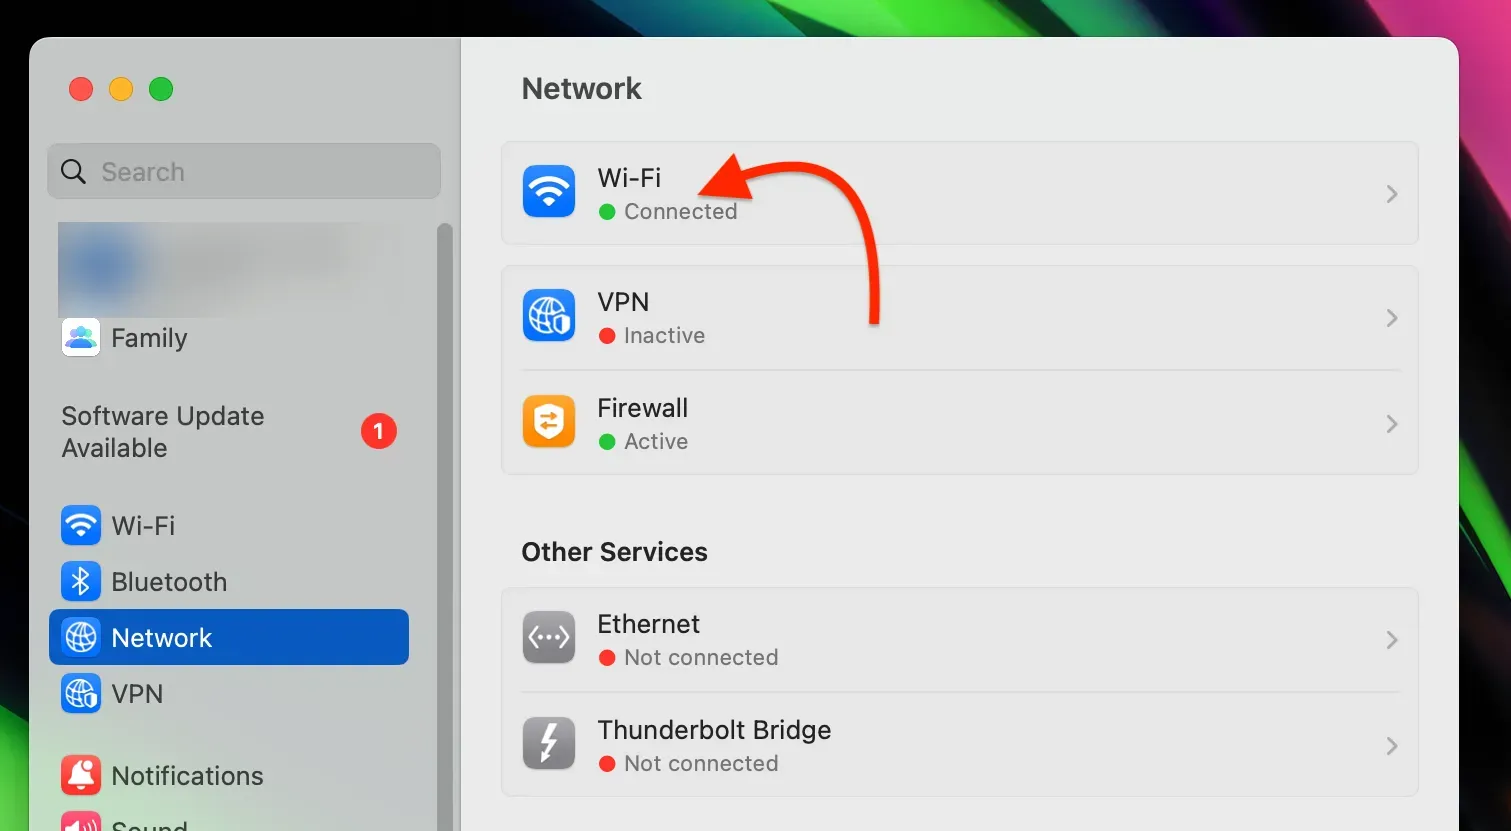
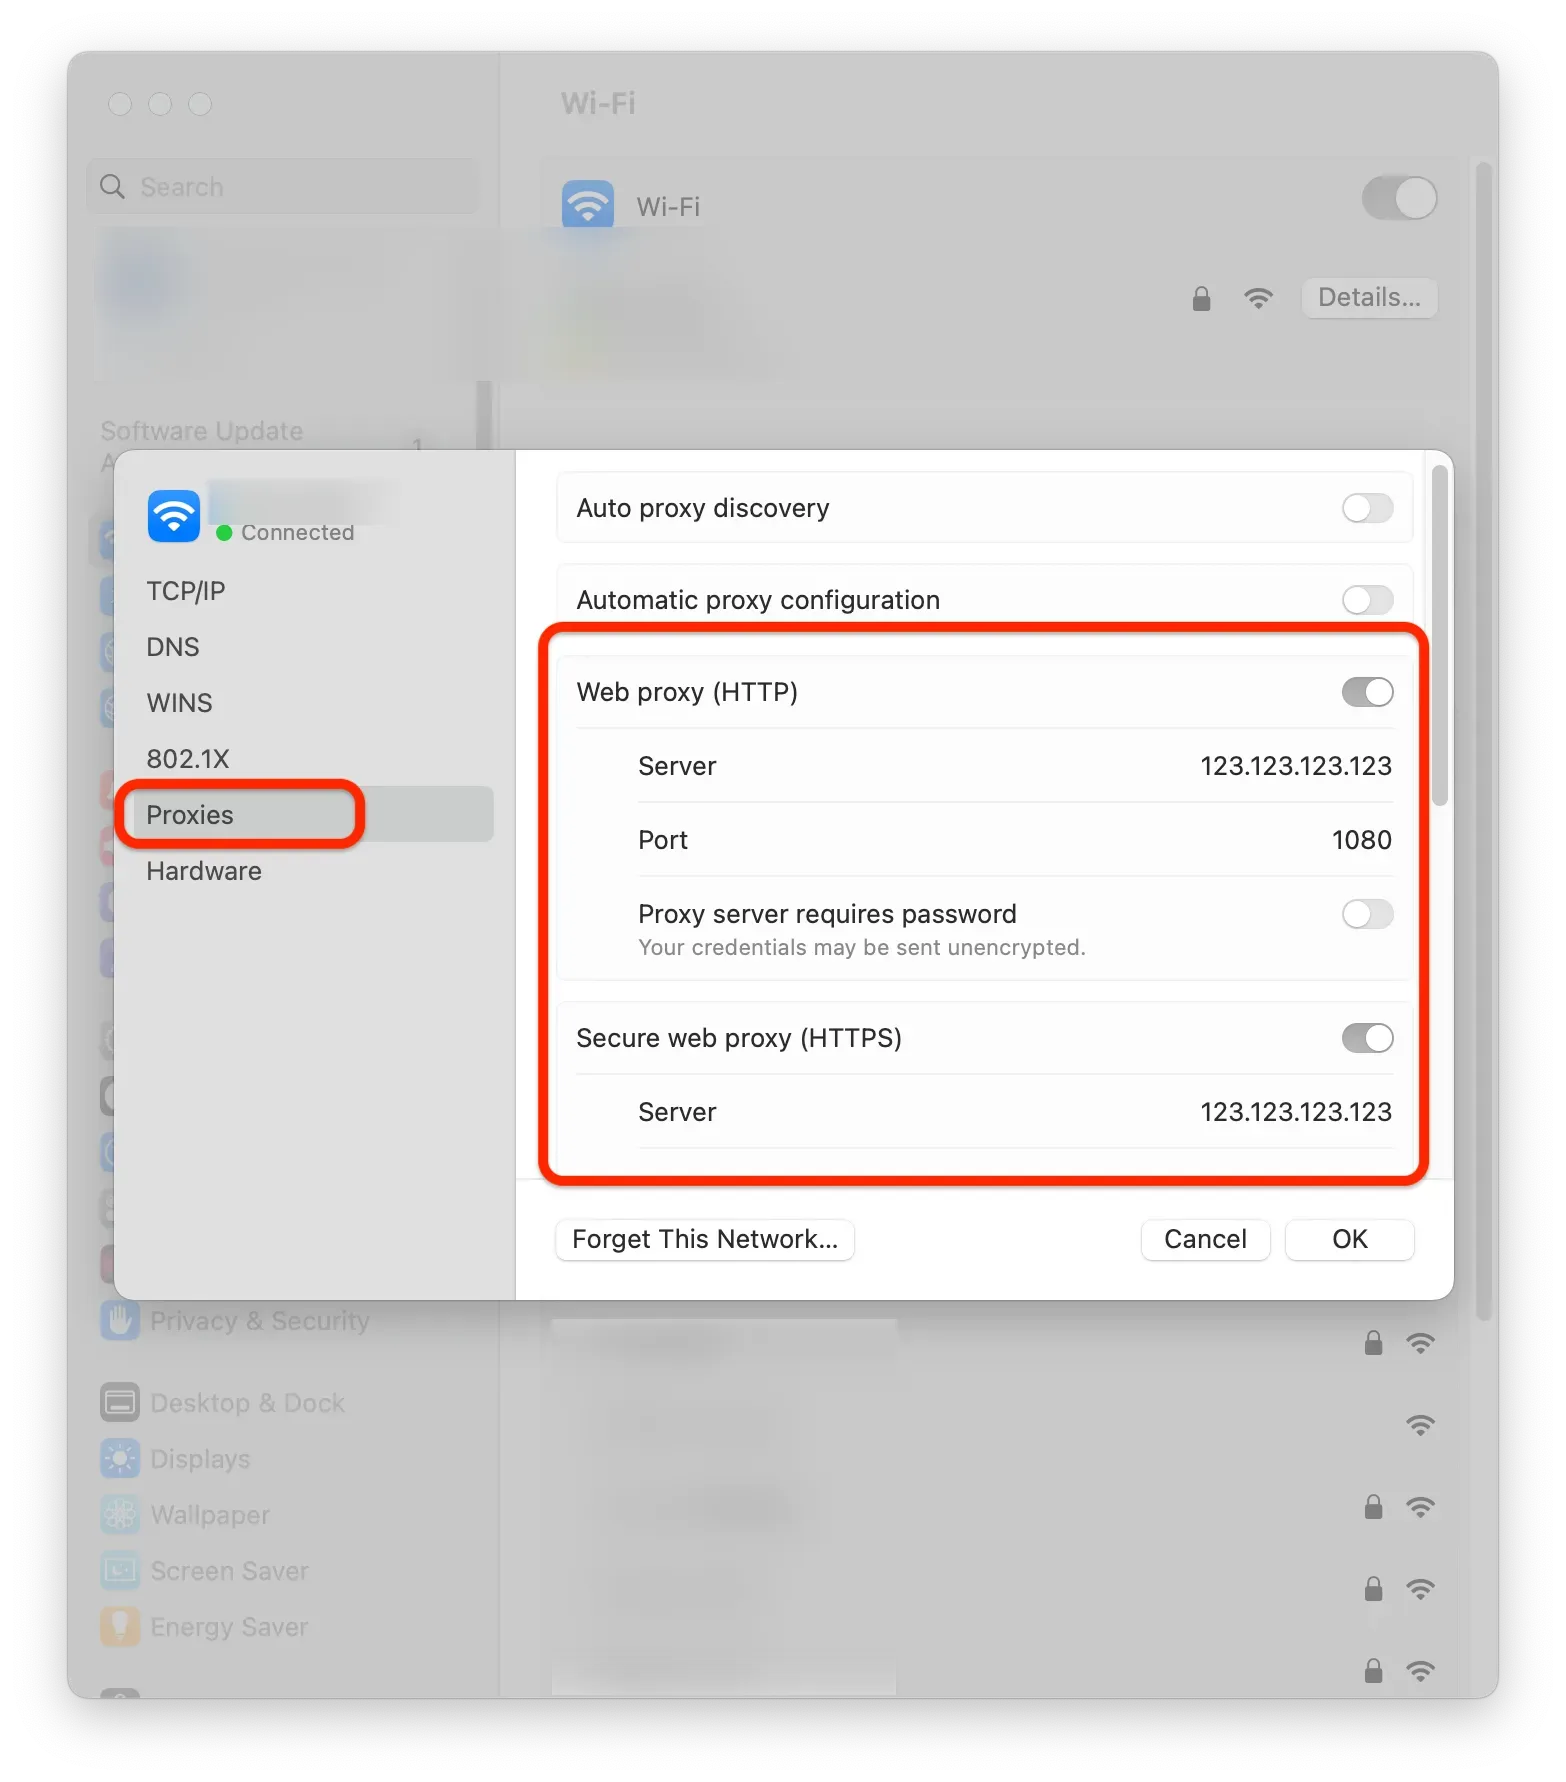
Once you select a location, click on the network name and go to the Details. In my case, my network is a Wi-Fi connection.
Configure the proxy for your network, and click OK to save.
Repeat this for the Proxy #2 until you have both proxied configured.
Step 3: Switch between locations to test proxies
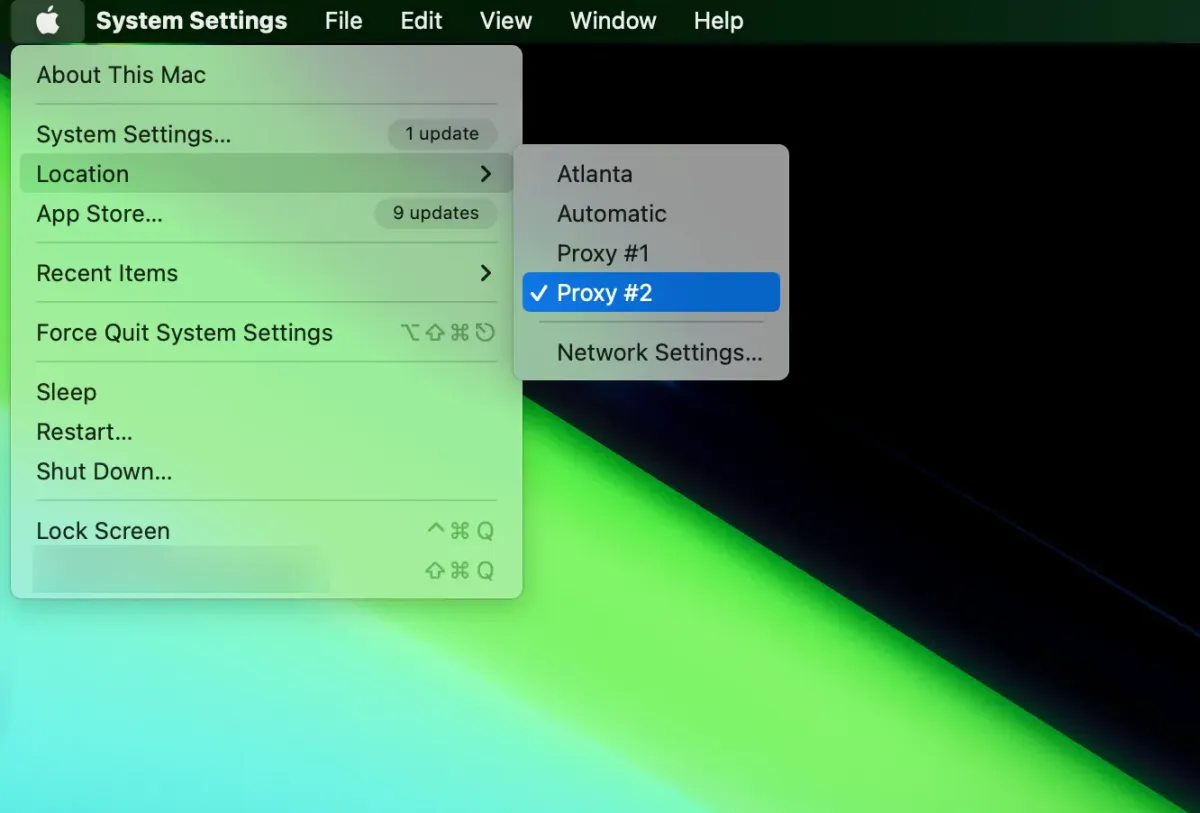
Now you can switch between proxies using the Apple icon on the top left corner, and see if your proxies are working as expected.

That’s it! You should now be able to switch between proxies on Mac. I leave my default location named Automatic without configuring a proxy for it, when I want to turn off the proxy for my network, I simply switch to the Automatic location.
Thank you for reading! This tutorial is written by humans, not by AI. I write useful tutorials and guides, you can subscribe to my blog for more article like this.