Send and receive emails with a custom domain name for free

In this tutorial, you will learn how to send and receive emails using your own domain name for free. To implement this solution, you will need a Gmail account as well as adding your domain name to Cloudflare. It's also important to note that email recipients can still find your personal Gmail address.
Prerequisites
Before we get started, make sure you have the following:
- A Gmail account.
- A domain name.
- A Cloudflare account.
Step 1: Have a Gmail account ready.
Have a Gmail account ready, and register for a Gmail if you don't already have one. This tutorial assumes you have a Gmail address as yourname@gmail.com.
Step 2: Add your domain name to Cloudflare
John has created an excellent tutorial that showcases how to set up an account with Cloudflare and add a domain name to Cloudflare. If you don't already have your domain name added to Cloudflare, please follow the guide to do so.
Step 3: Create your email routes
After you add your domain name to Cloudflare, follow the steps below to create your desired email address.
Follow the below steps if it is your first time setting up Cloudflare Email Routing for this domain name:
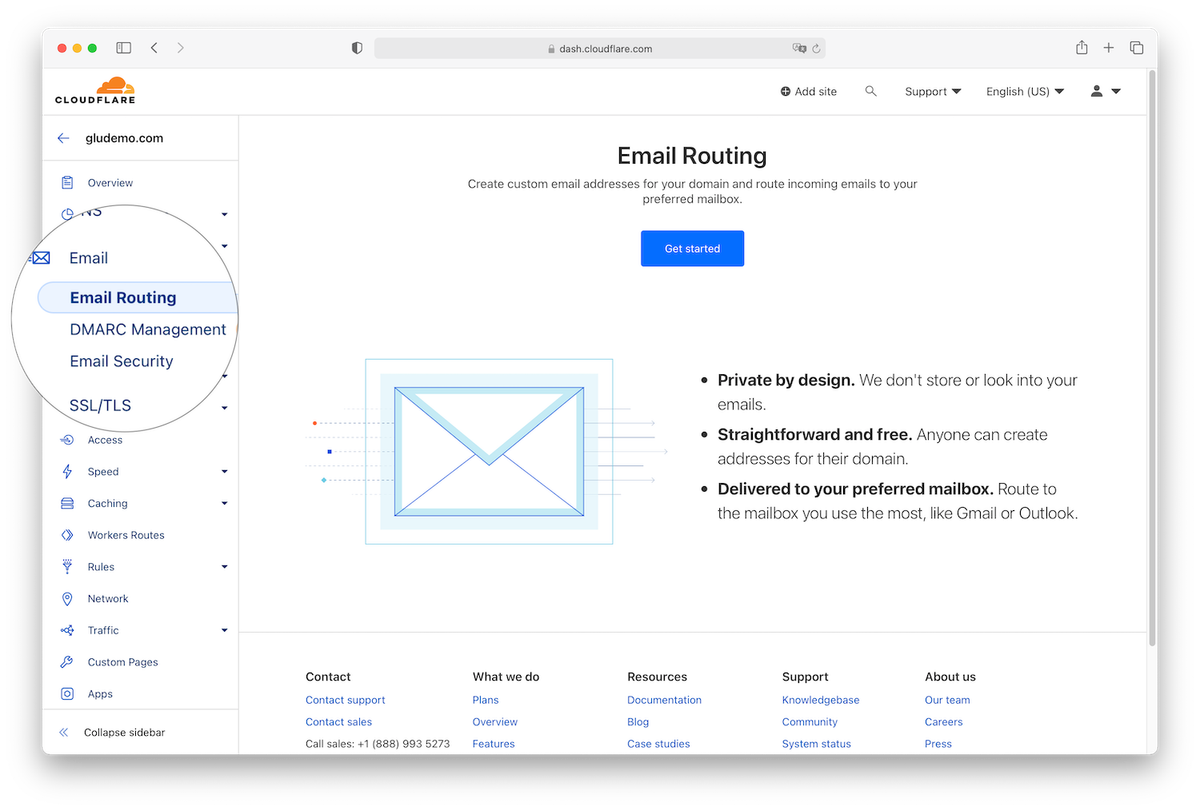
- Click on the domain name from Cloudflare Dash, and navigate to the Email menu.
- Click the Get Started button to continue.
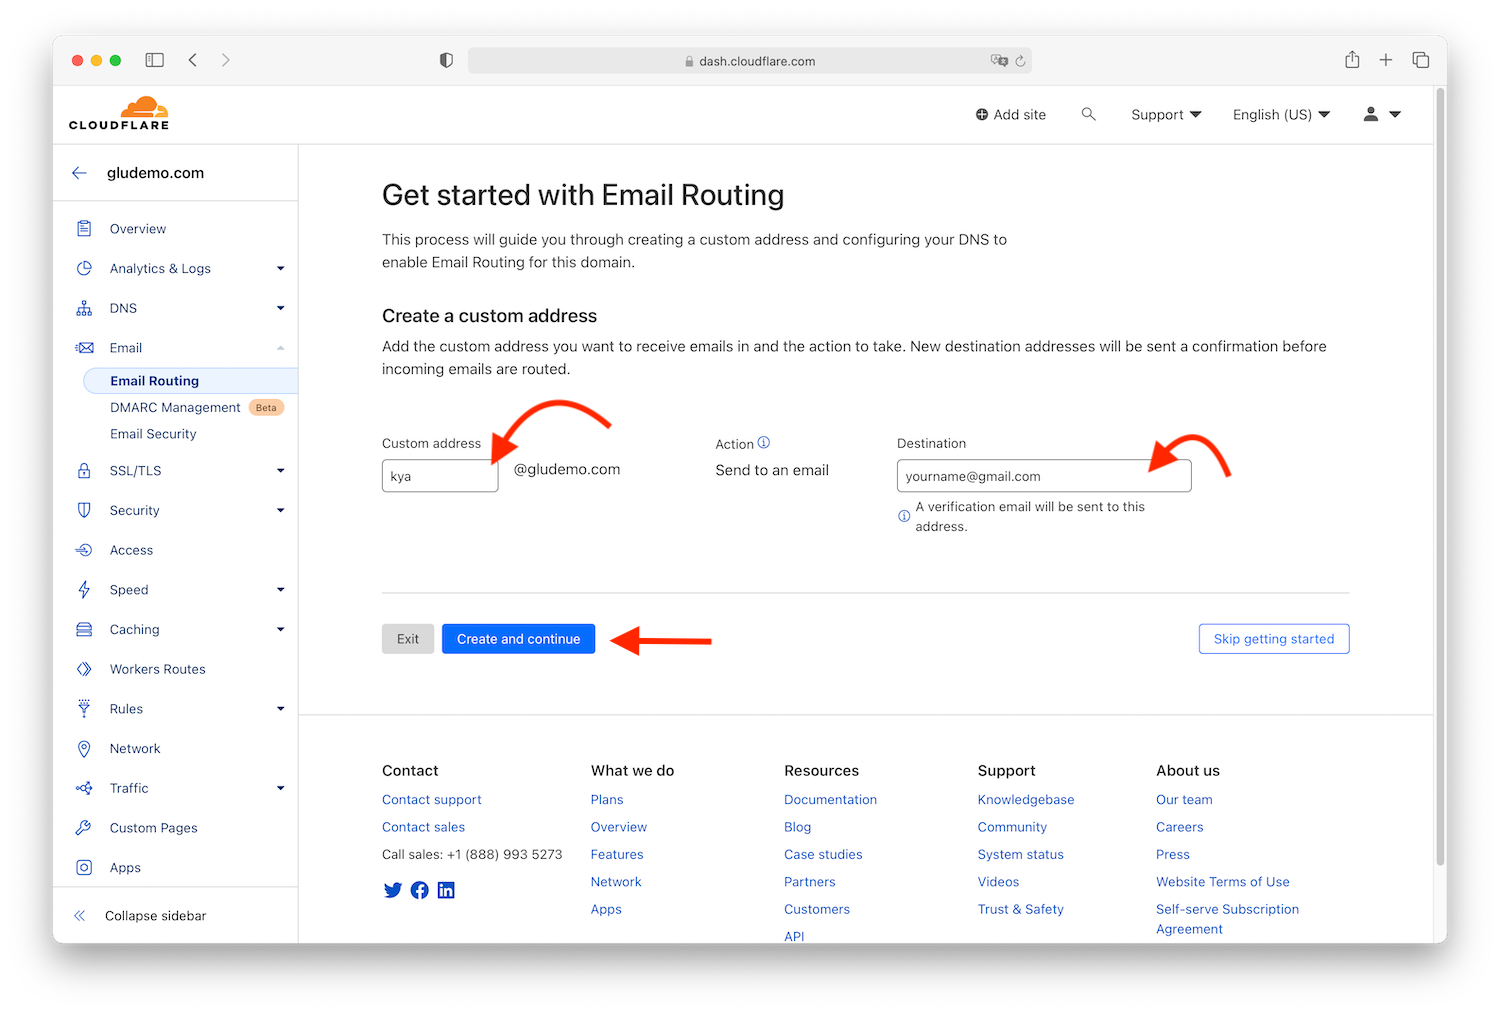
- Provide a name for your new email address and enter your Gmail address
yourname@gmail.com. Then click Create and continue. - Go to your Gmail inbox, and click the Verify email address button on a verification email sent from Cloudflare.
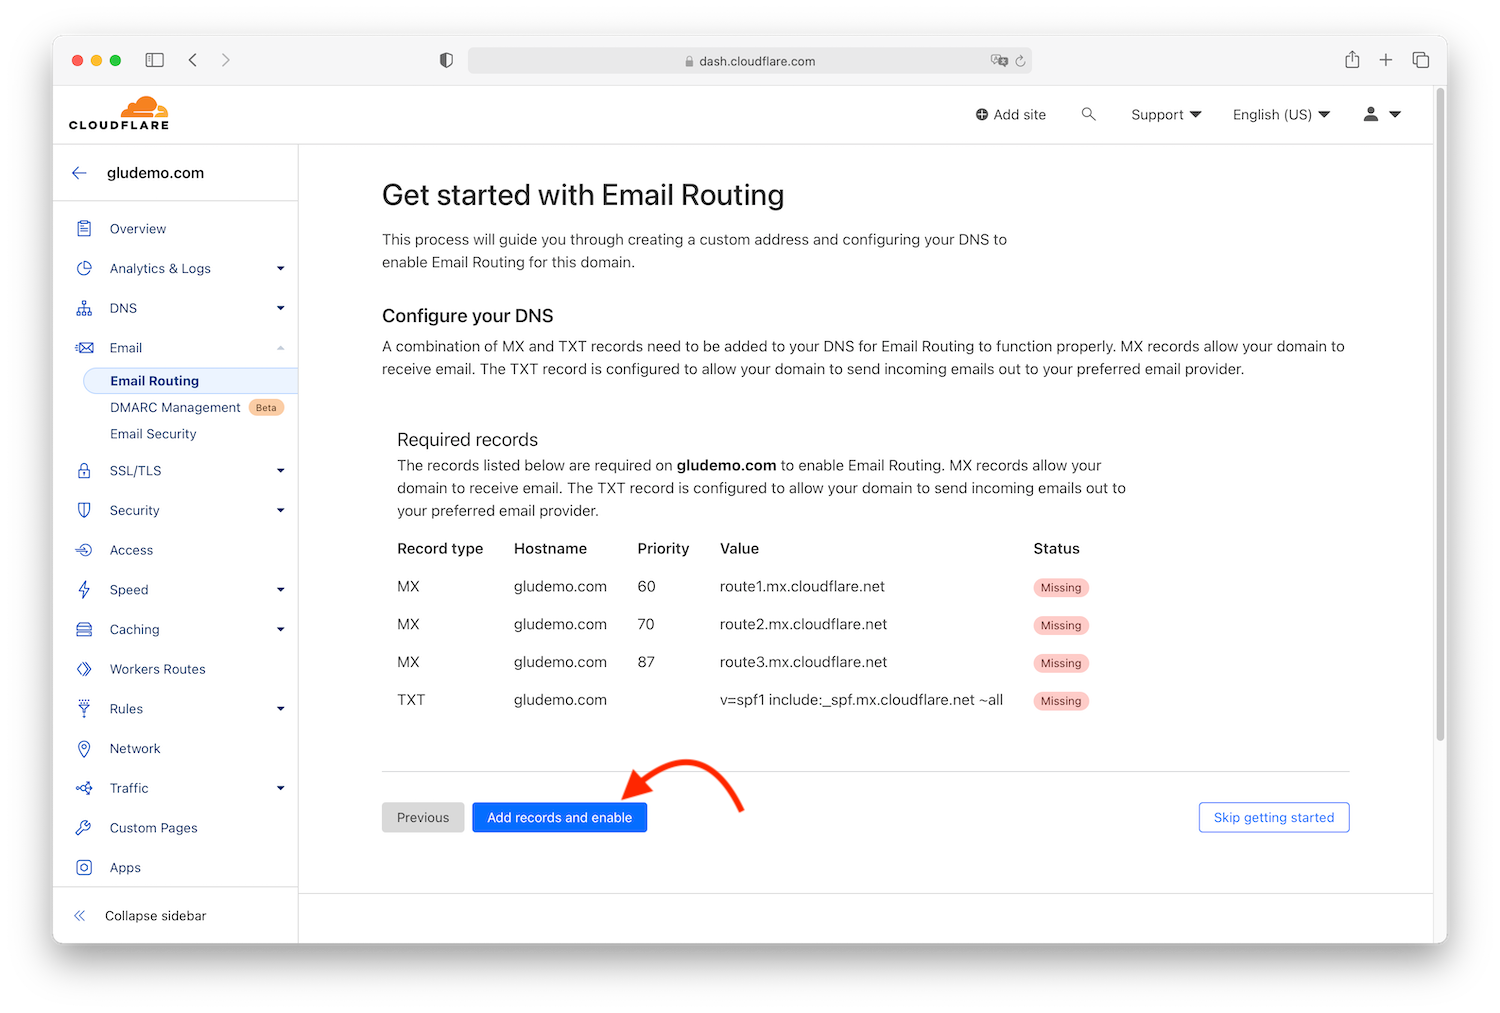
- Go back to your Cloudflare Email Routing page, and click Add Records and Enable button.
Follow the below steps if it's NOT your first time setting up Cloudflare Email Routing for this domain name:
- Click on Routes, and then click the Create address button.
- Scroll down to the Destination addresses, and click Add destination address button.
- Type in your Gmail address
yourname@gmail.comand click Save. - Check your Gmail inbox for a verification email, and click the link on the verification email once received.
- Go back to your Cloudflare email routes area, scroll up, and click the Create address button.
- Put a name for your new email address, and choose your Gmail as the destination from the dropdown. Click Save to continue.
That's it! You have created an email address with your own domain name. Any email sent to the new email address will be forwarded to your Gmail. You can test it by sending an email to your new email address and checking it from your Gmail.
Step 4: Set up an alias in Gmail
Next, we are going to set up an alias in Gmail so you can send emails with the new email address. Follow the steps below to set up an alias in Gmail.
- Enable 2FA for your Google account.
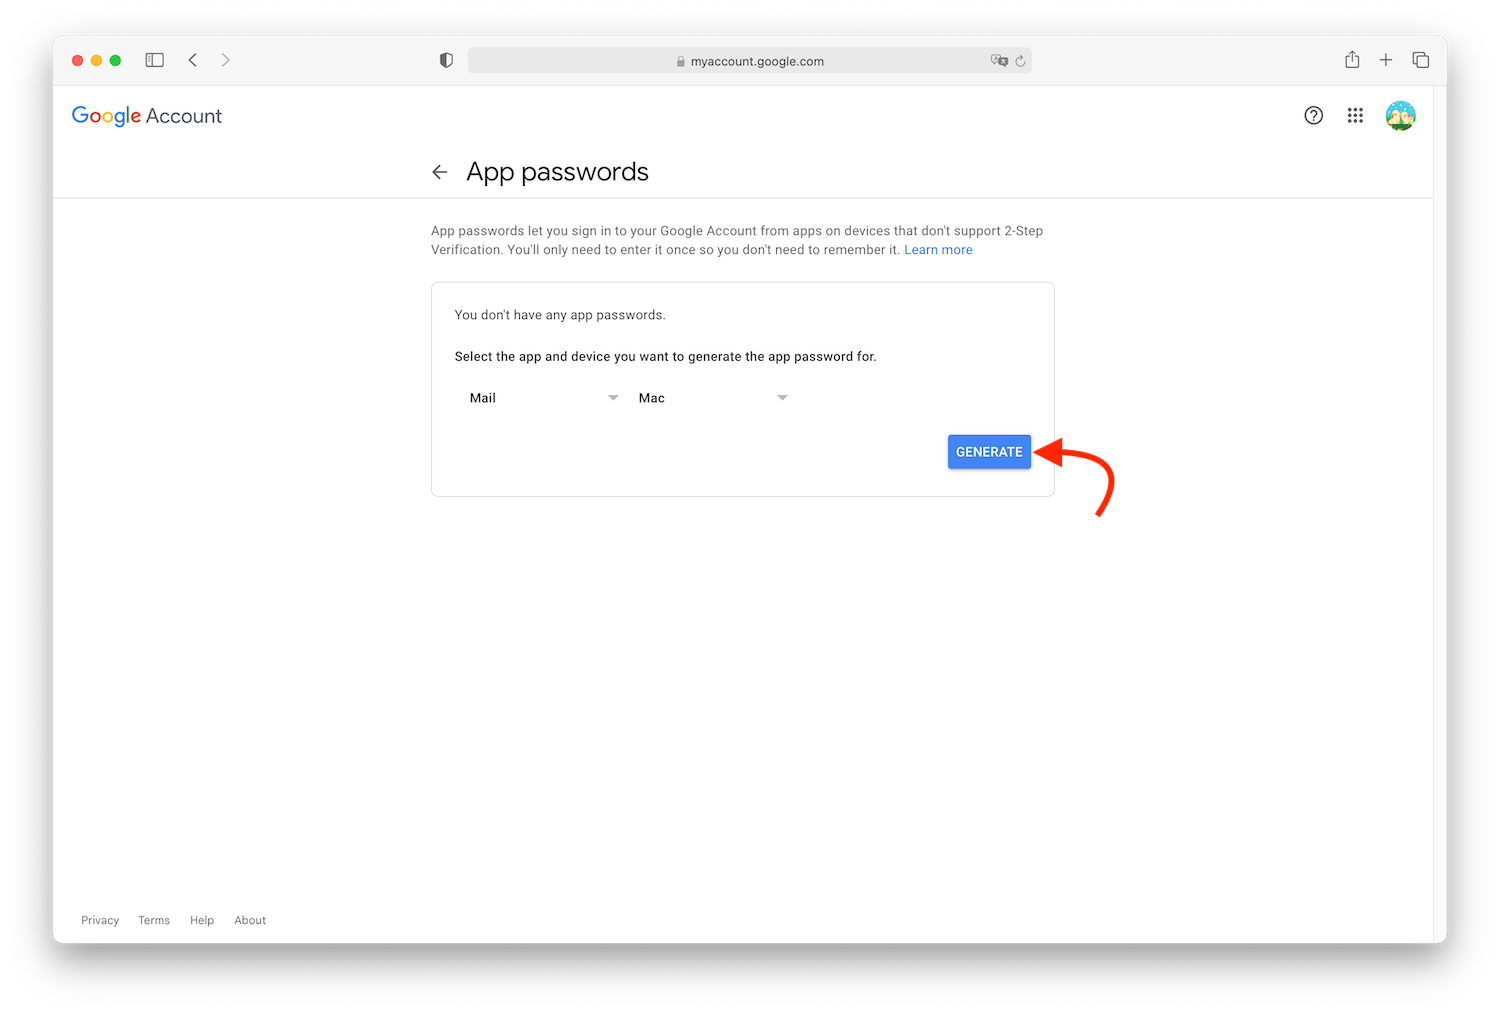
2FA is short for two-factor authentication, Google requires 2FA to be enabled in order to set up an alias in Gmail. Go to 2-Step Verification and turn it on. - Create an App Password for your Gmail.
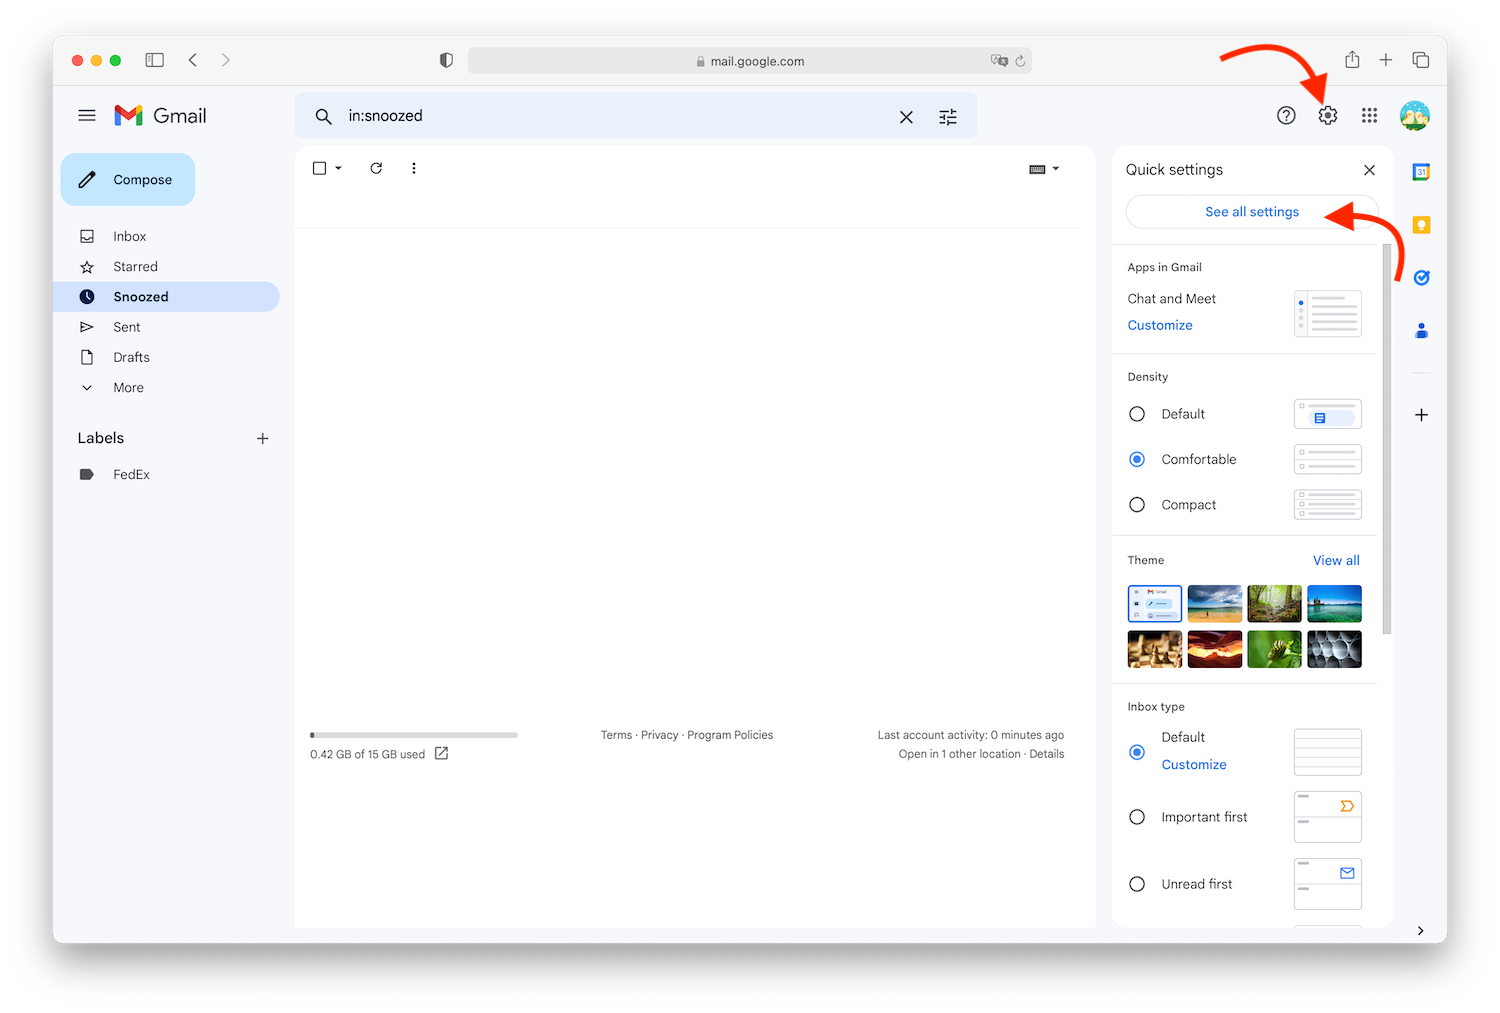
Go to App Passwords, and choose Mail from the first drop-down menu and any device from the second one. Click GENERATE button to generate a password. Copy the password from the pop-up window before you close it. - Add your custom email to Gmail.
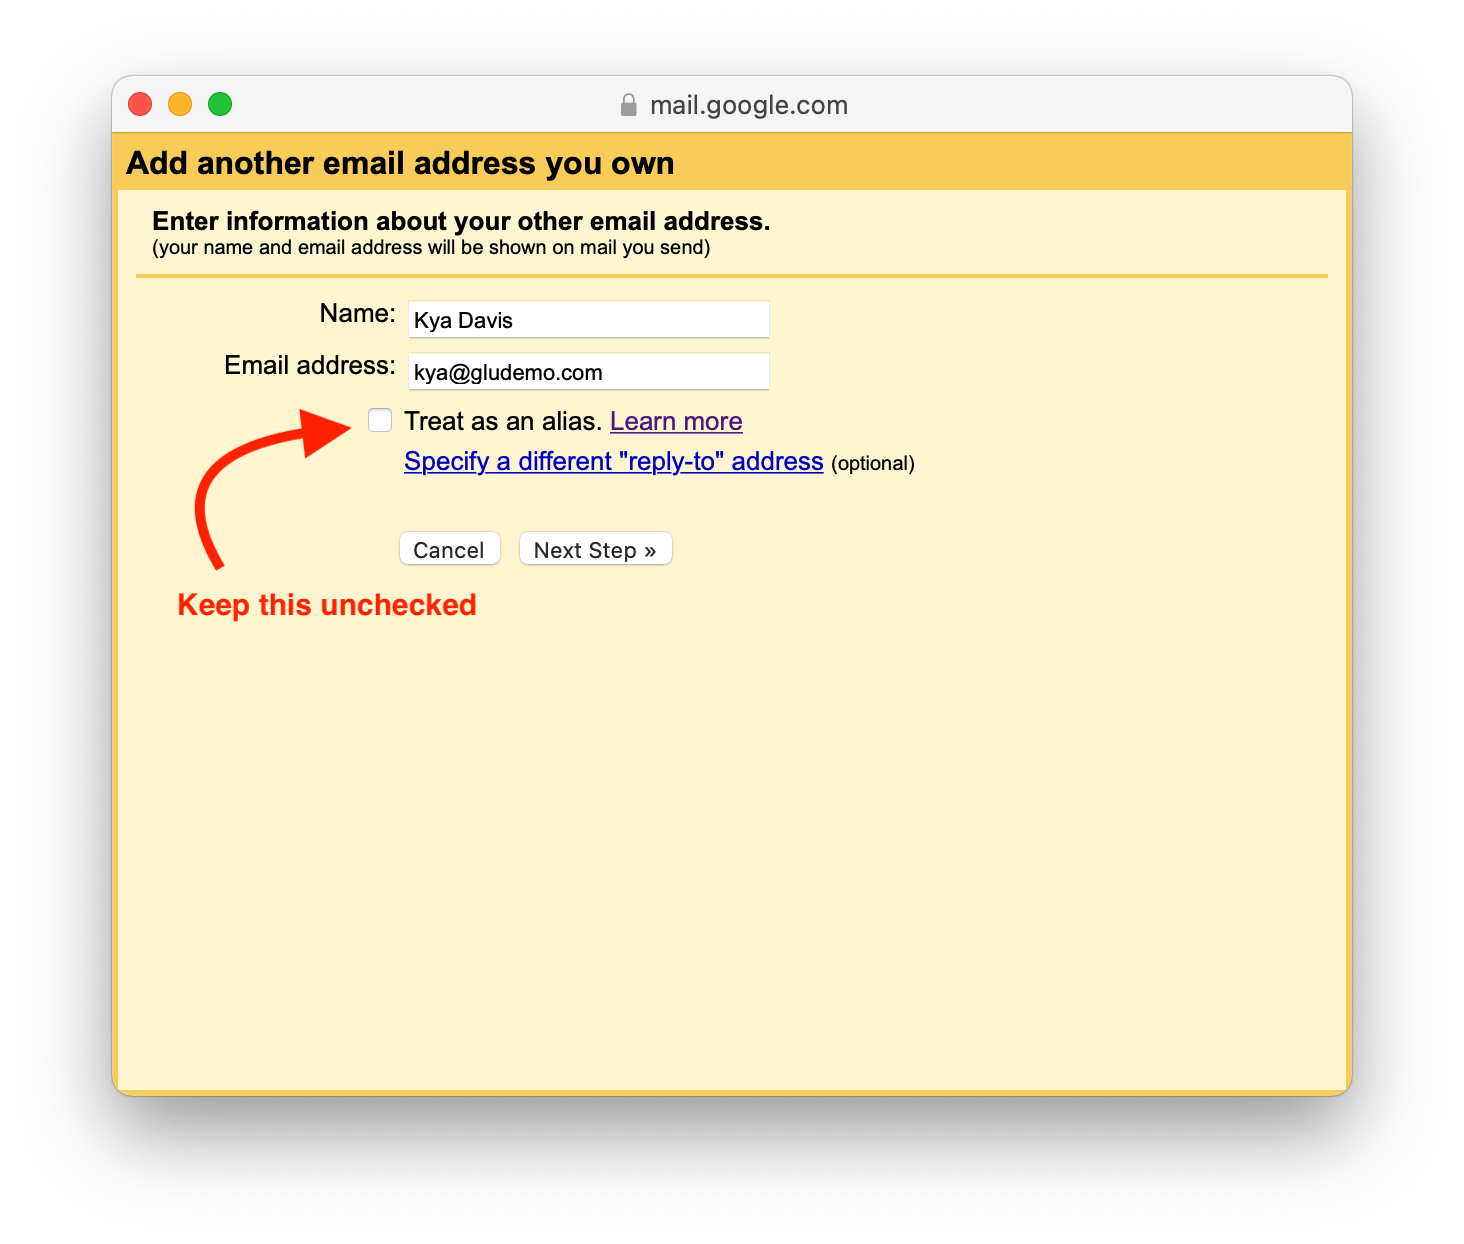
Go to Gmail -> Settings -> Accounts and Import. Then, select “Add another email address” from the "Send mail as" row. - Enter your sender’s information.
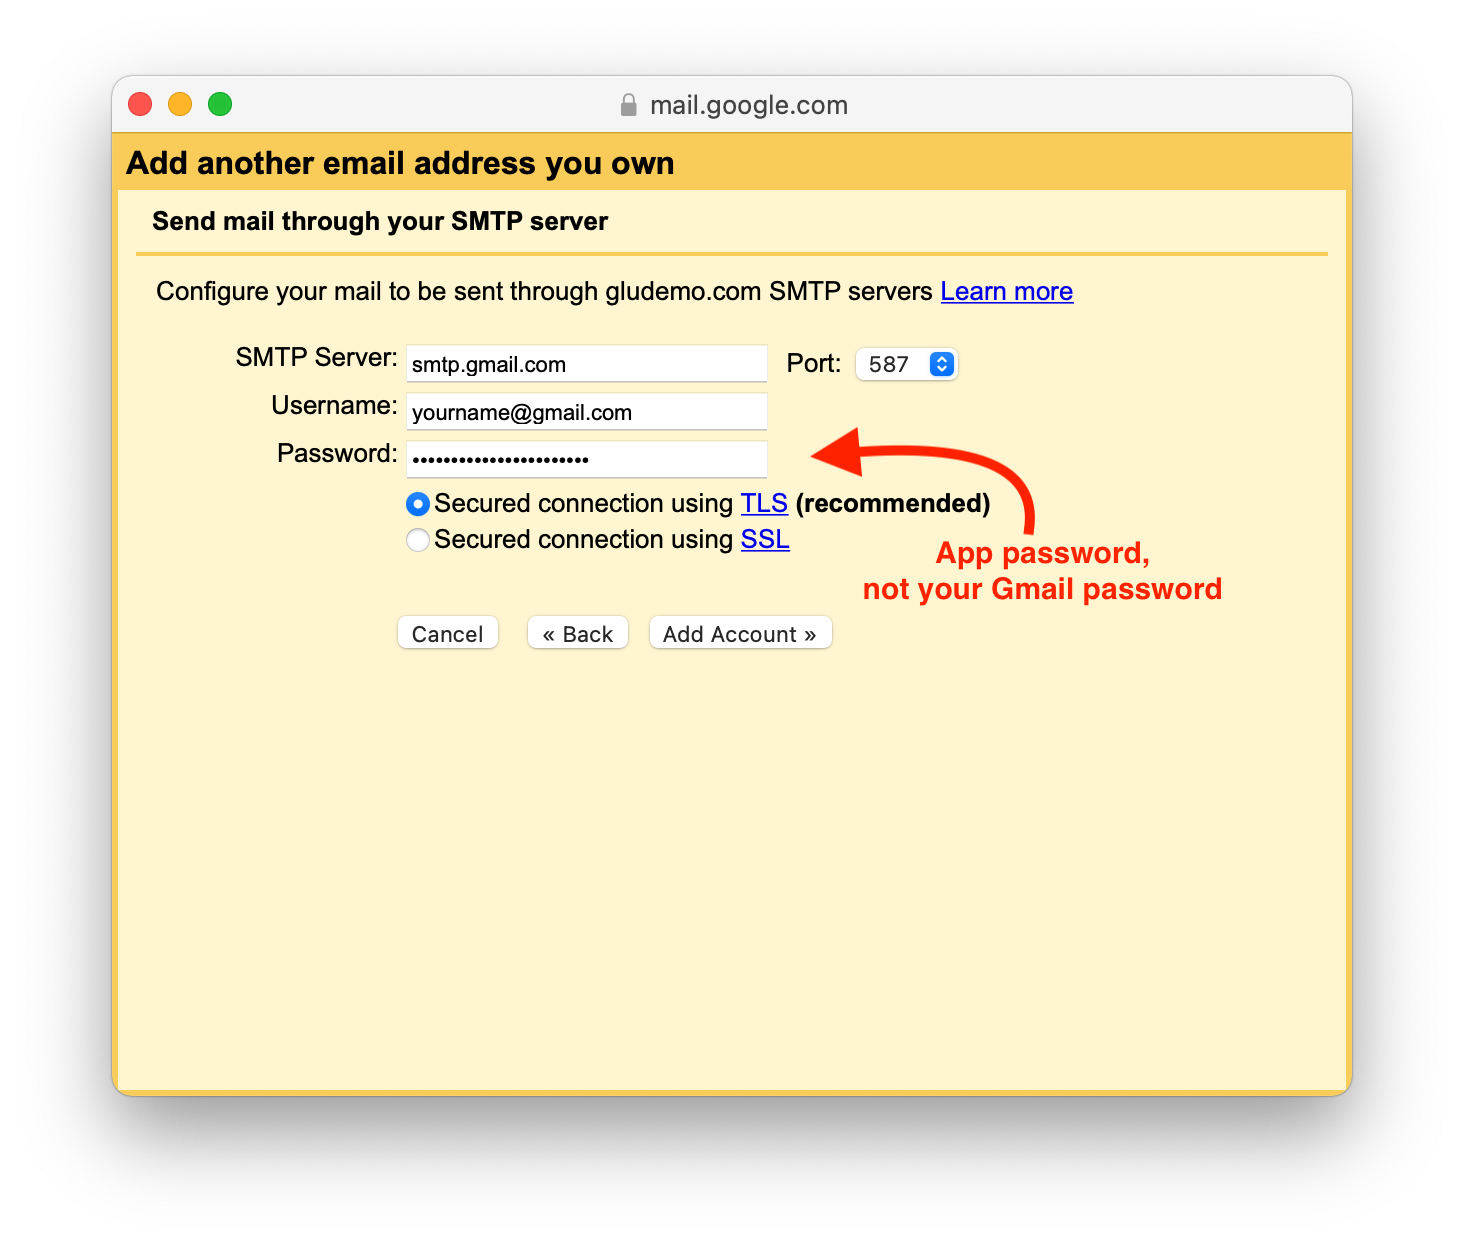
Enter your sender’s name and email address, this is your email address with a custom domain. Uncheck the “treat as an alias” box, and click Next Step. - Enter your Gmail server information.
- SMTP Server: smtp.gmail.com
- Port: 587
- Username: your Gmail addressyourname@gmail.com.
- Password: This is the password you generated in step 2.
- Keep the "Secured connection using TLS (recommended)" selected.
Click Add Account button to continue. - Verify your ownership of the send-from address.
Go to your Gmail inbox, there should be an email titled "Gmail Confirmation - Send Mail as yourname@example.com", click the link in the email to verify your ownership. - Send an email to test.
Now you can compose a new email from Gmail with your new email address. Please be sure to choose your new email address as a send-from address from the From dropdown.
That's it! Now you have a new email address with your own domain name, and you can send and receive emails right from your Gmail.
Wrapping up
In this tutorial, you have learned how to add your domain name to Cloudflare, create an email address (or route) with Cloudflare Email Route, forward emails (that are sent to your new email address) to your personal Gmail, and set up an alias with Gmail. This solution may not be perfect, but it's an option for startup businesses that have a limited budget for email service.